Branches
A branch is an isolated line of development. Every checkpoint created belongs to a branch and a series of checkpoints in a branch can track the development of an application or a particular feature. A PlayCanvas project will always have at least one branch, the main branch, and will often have multiple branches. You can merge the changes from one branch into any other branch using the version control panel in the Editor.
Main branch
Every project has a branch called "main" which is always present and cannot be deleted. In most respects this branch is no different from any other branch. However, in some cases (for example, the REST API) the "main" branch will be used as a default if no other branch is specified. A common scenario is to treat the main branch as the current development state of your application; to use another branch for stable releases and still more branches for feature development. However, you should feel free to use or not use the main branch as best suits your needs.
Current branch
For each project you work on you will always have a single branch set to be your current branch. This is the branch that you are actively working on and whenever you open the editor or edit a code file your changes will apply to your current branch.
Creating a new branch
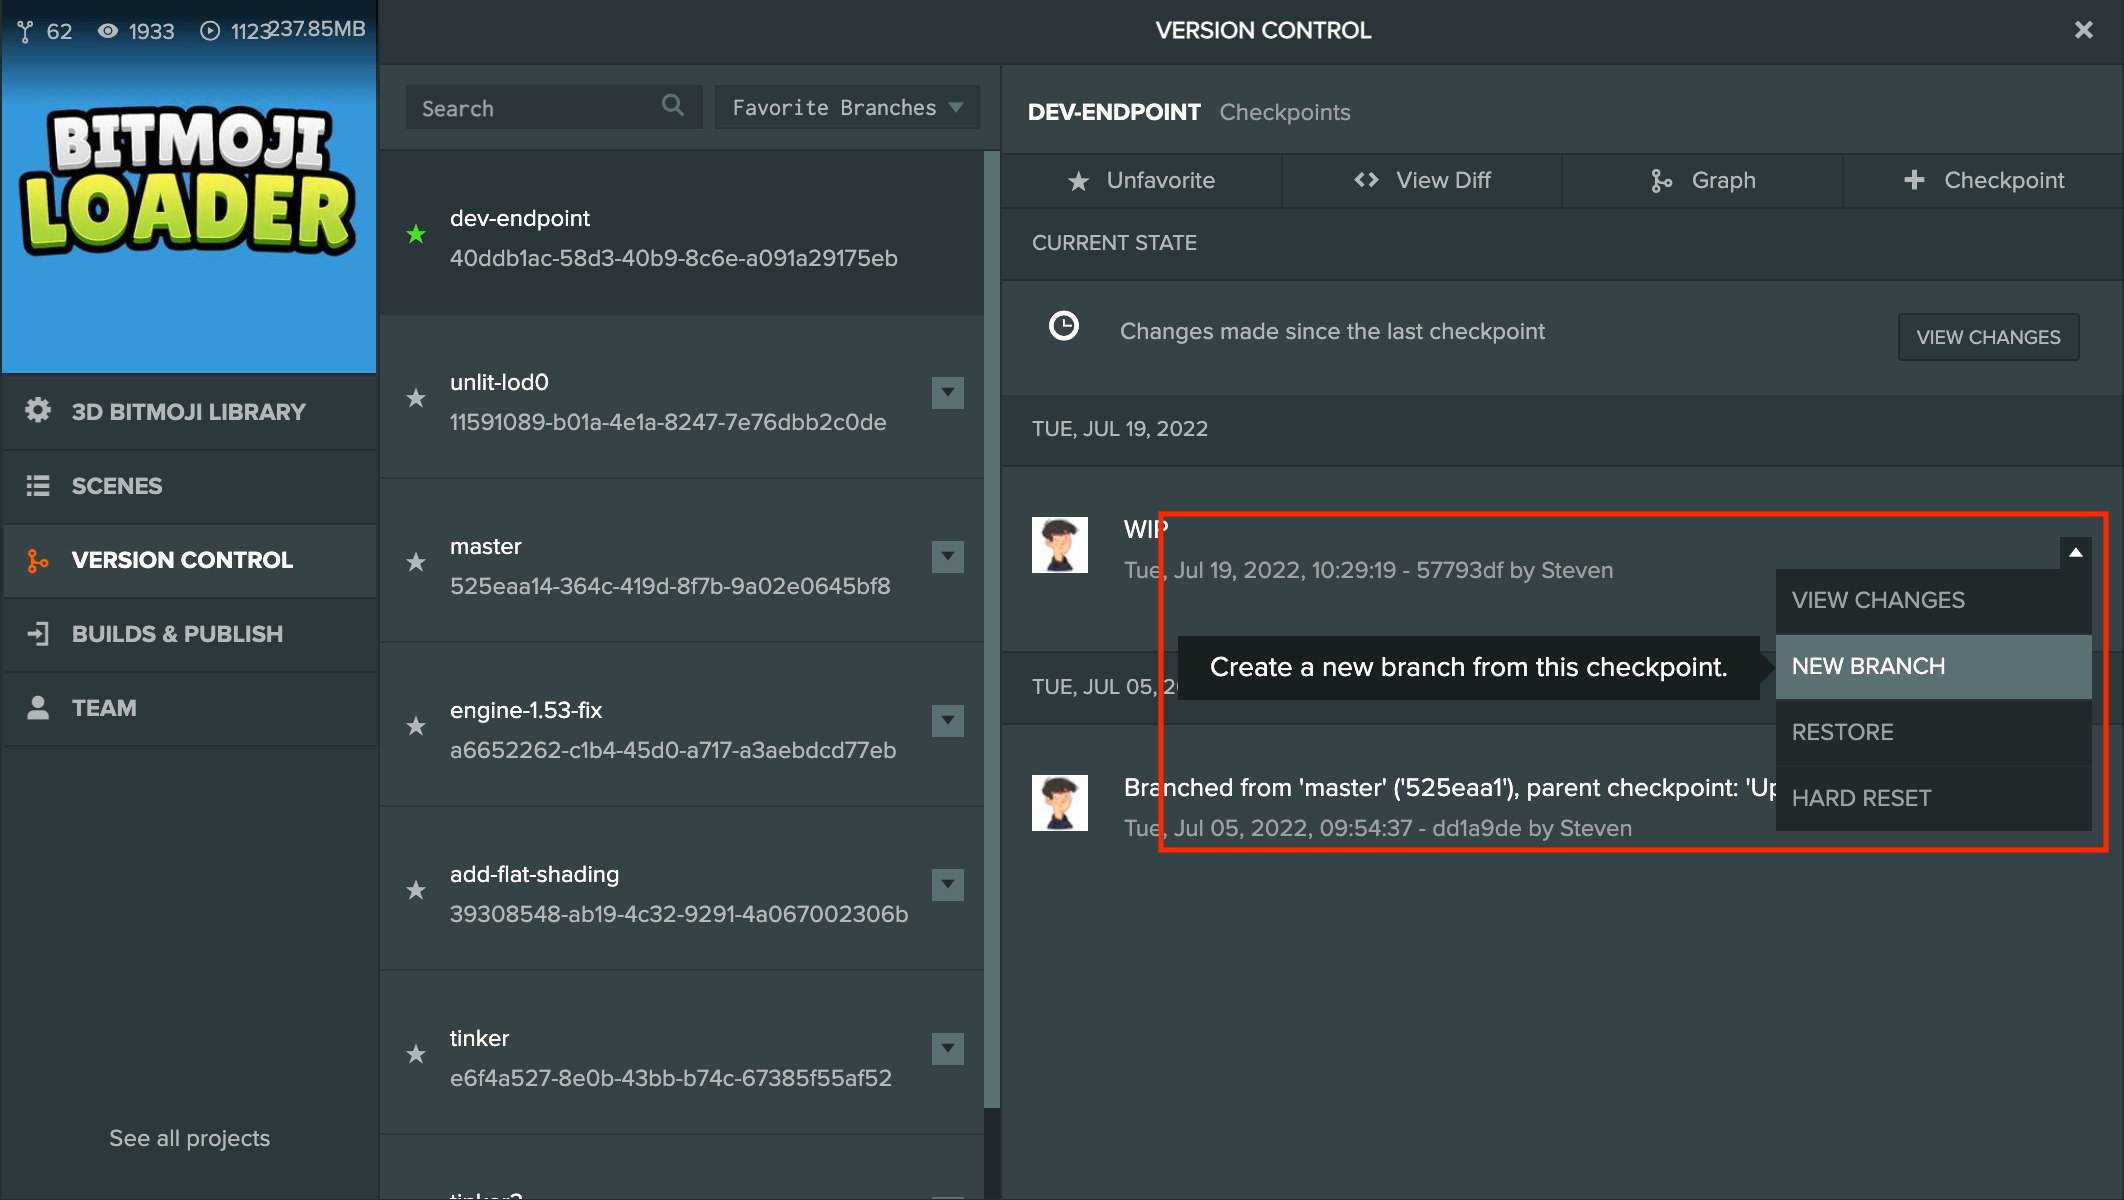
To create a branch open the version control panel, select the checkpoint that you wish to start the branch from and choose the "New Branch" option in the checkpoint's drop-down menu.
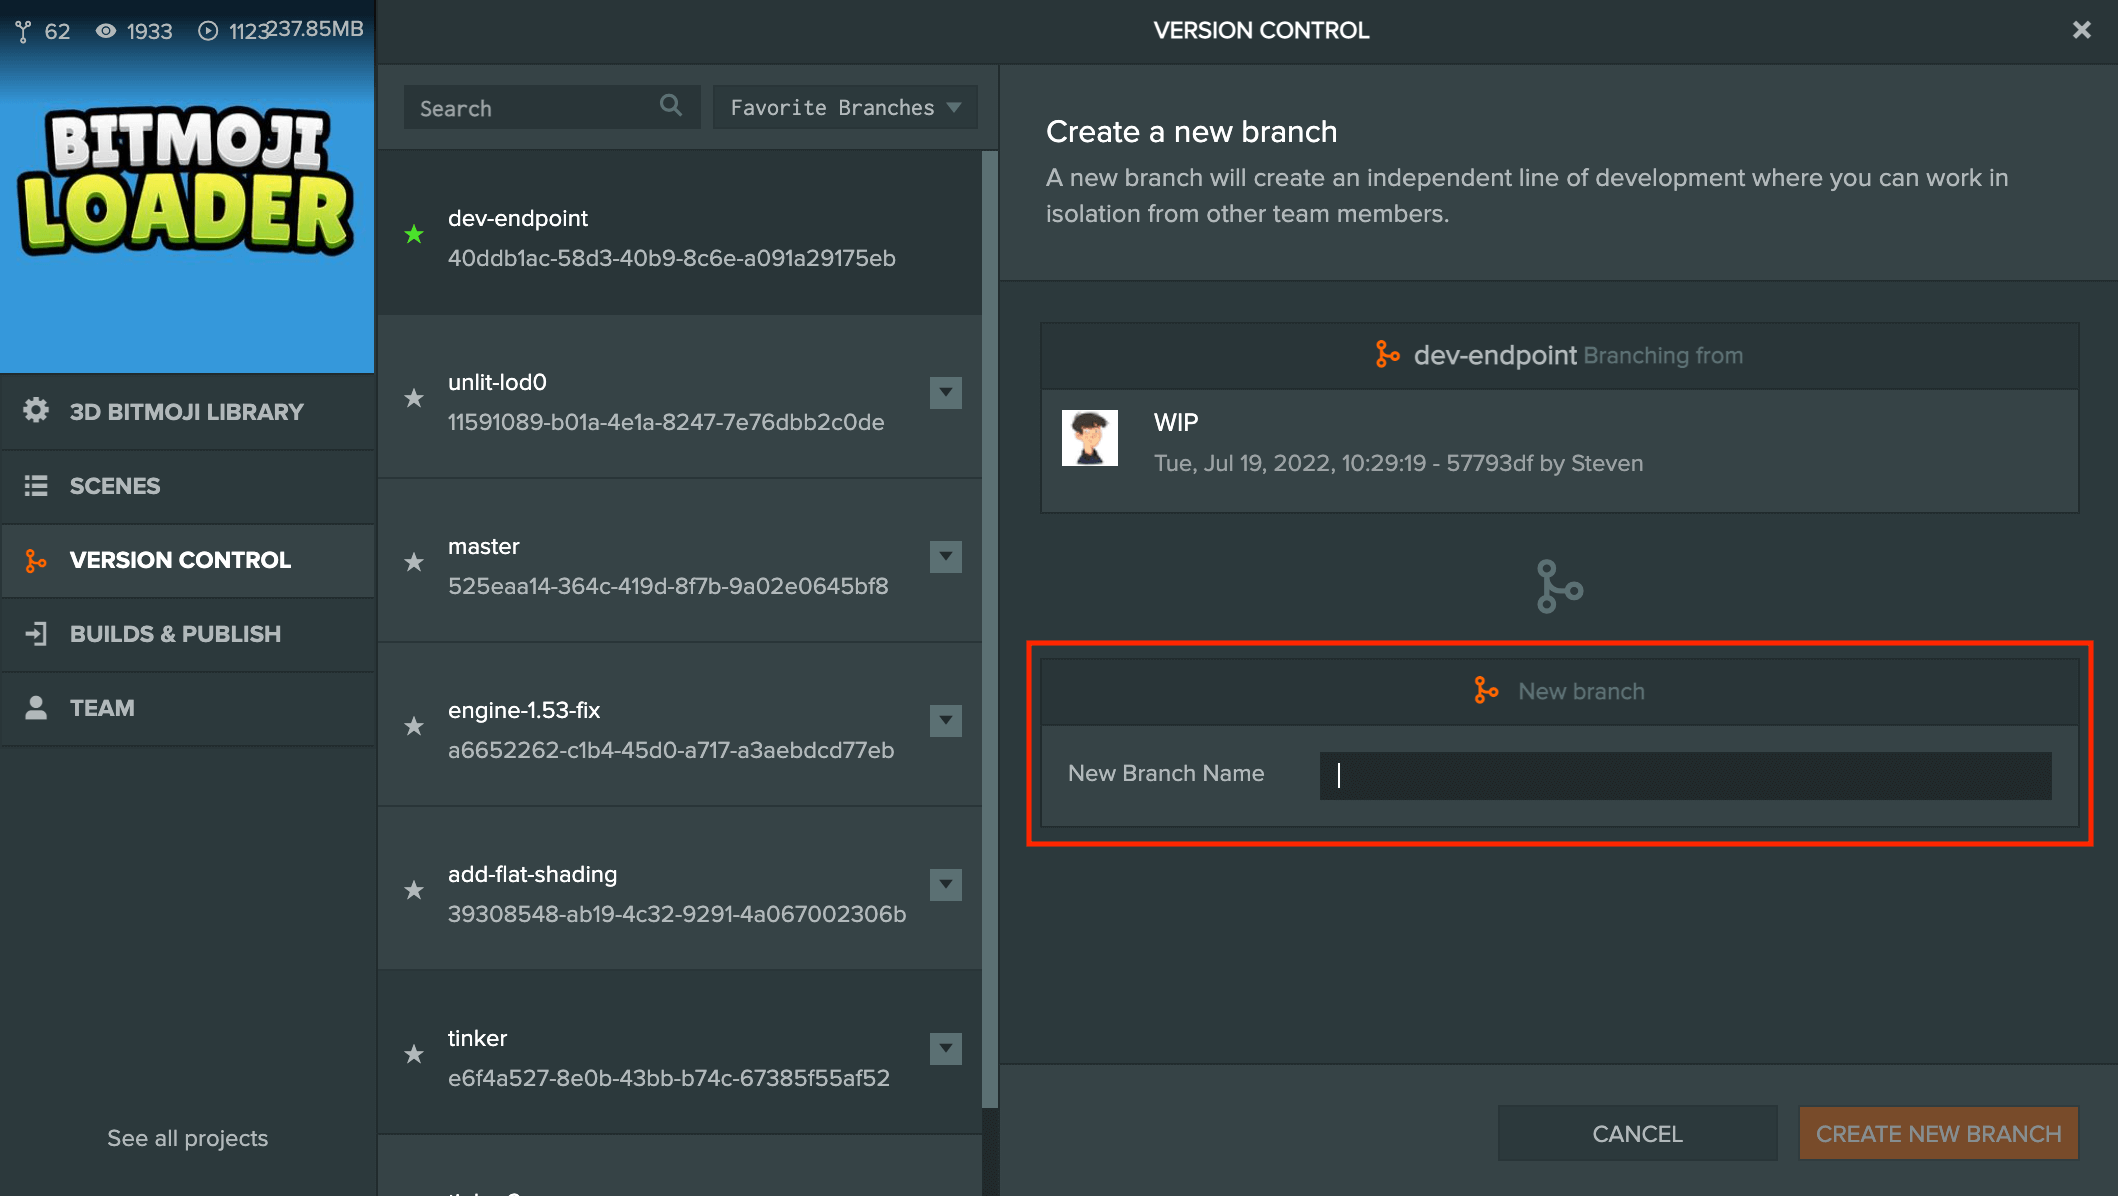
You will be asked to name your branch. Try to give your branch a description name like fix-player-bug or
refactor-sound-effects. After creating the branch you will automatically be switched to the new branch you just created.
Branches created by you will automatically be favorited so you can quickly find them in the branch filter for favorites.
Filtering branch list
You can filter branches between:
- Favorites - Branches that are favorited by you.
- Open - All branches that are open.
- Closed - All branches that are closed.
Favoriting a branch can be done with the following options:
Drop down menu
Selected branch button
Searching for a branch
To help find a branch in the current list filter, you can use the search bar at the top.
Switching to a branch

To switch branch open the version control panel, select the branch you wish to switch to and choose the "Switch to this branch" option in the branch's drop-down menu.
The editor will reload with your current branch switched to the chosen branch.
Closing a branch
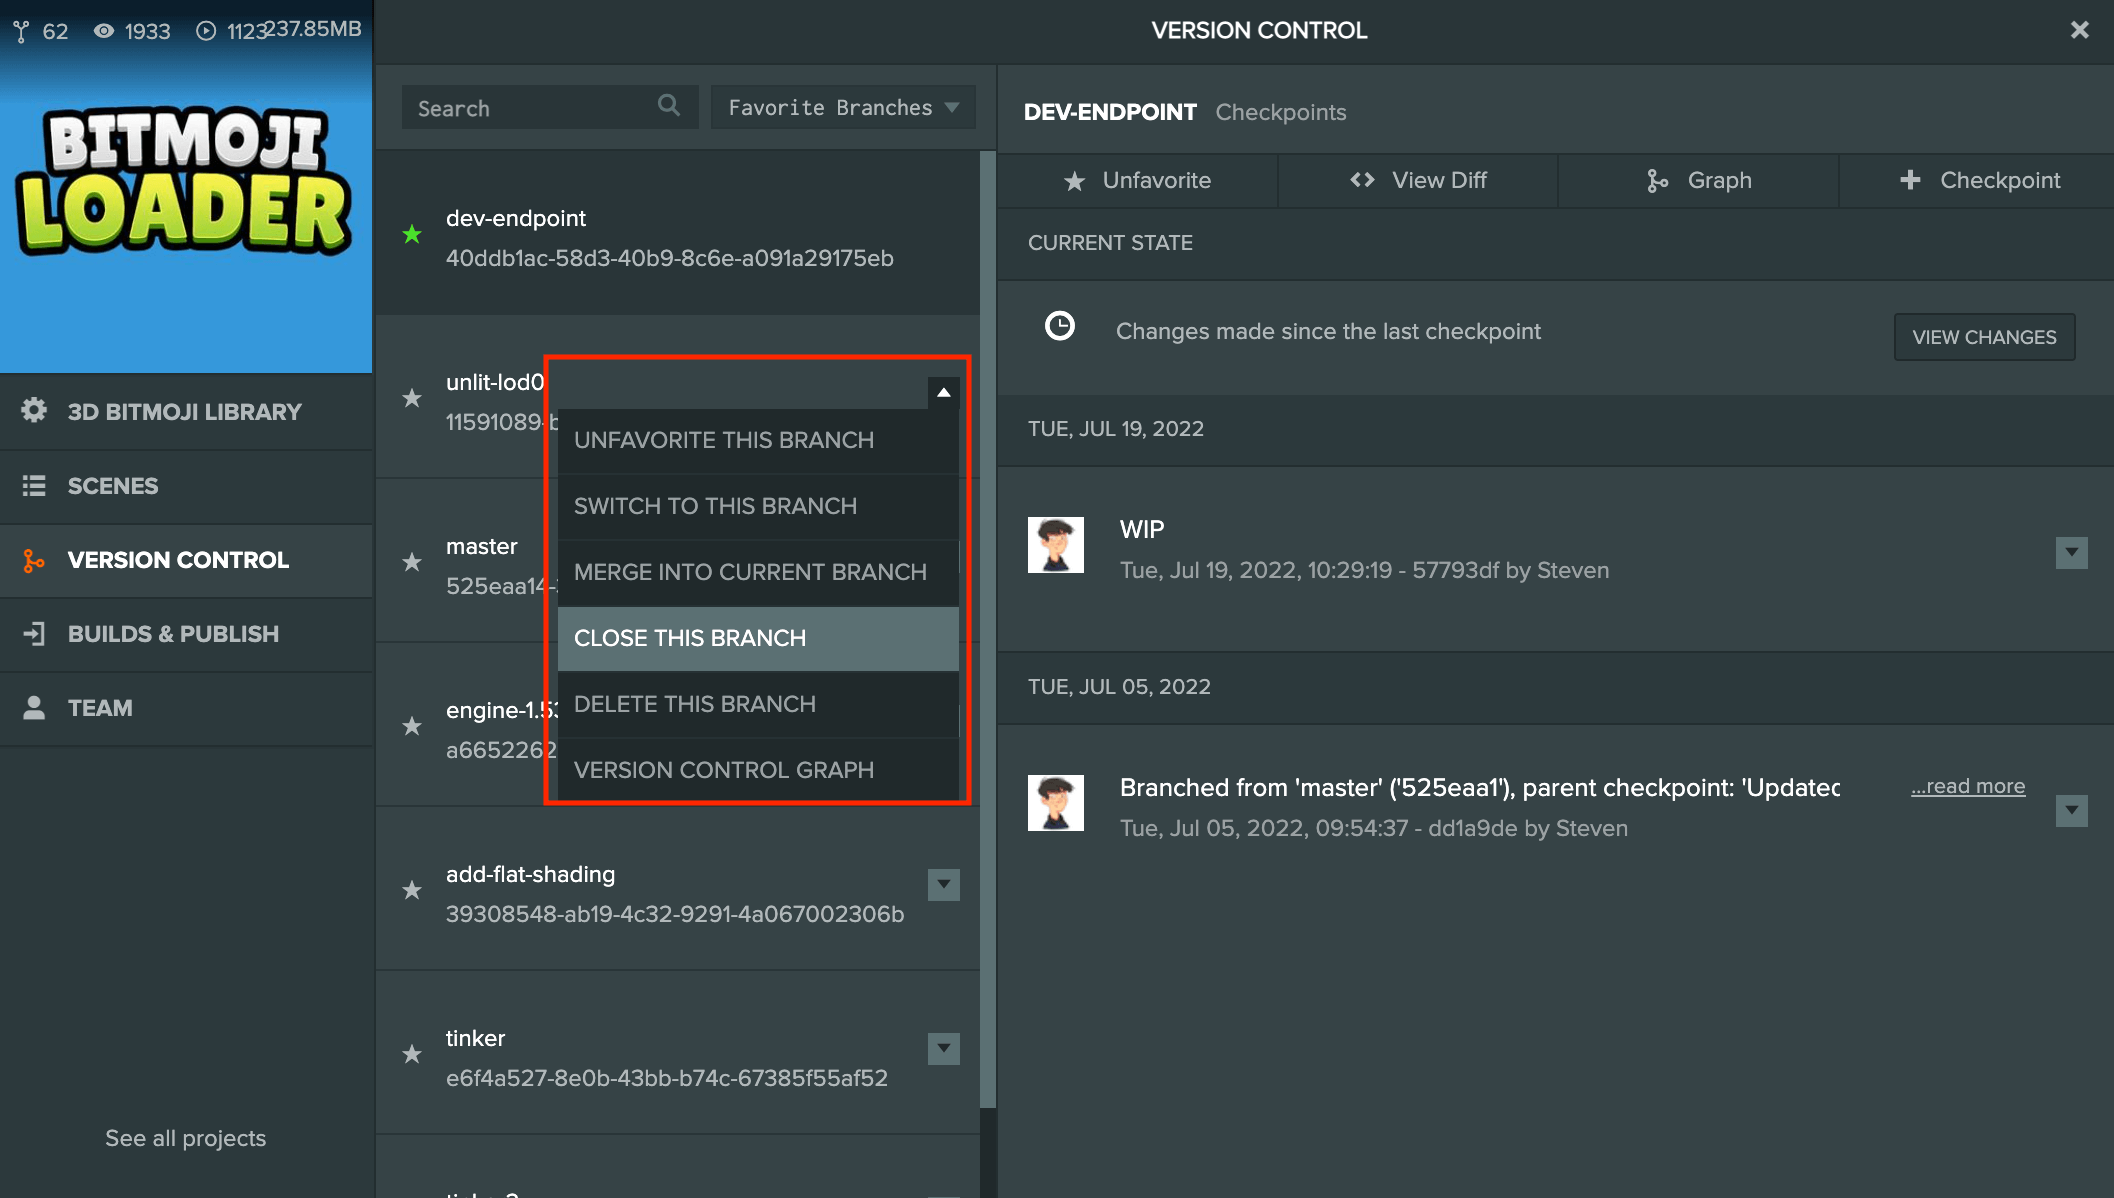
If you have completed work on a branch, you can close it which will remove it from the open branches list.
To close a branch, open the version control panel, select the branch you wish to close and choose the "Close this branch" option in the branch's drop-down menu. Note that you cannot close your current branch or the main branch. Switch to a different branch first if you wish to close your current branch.
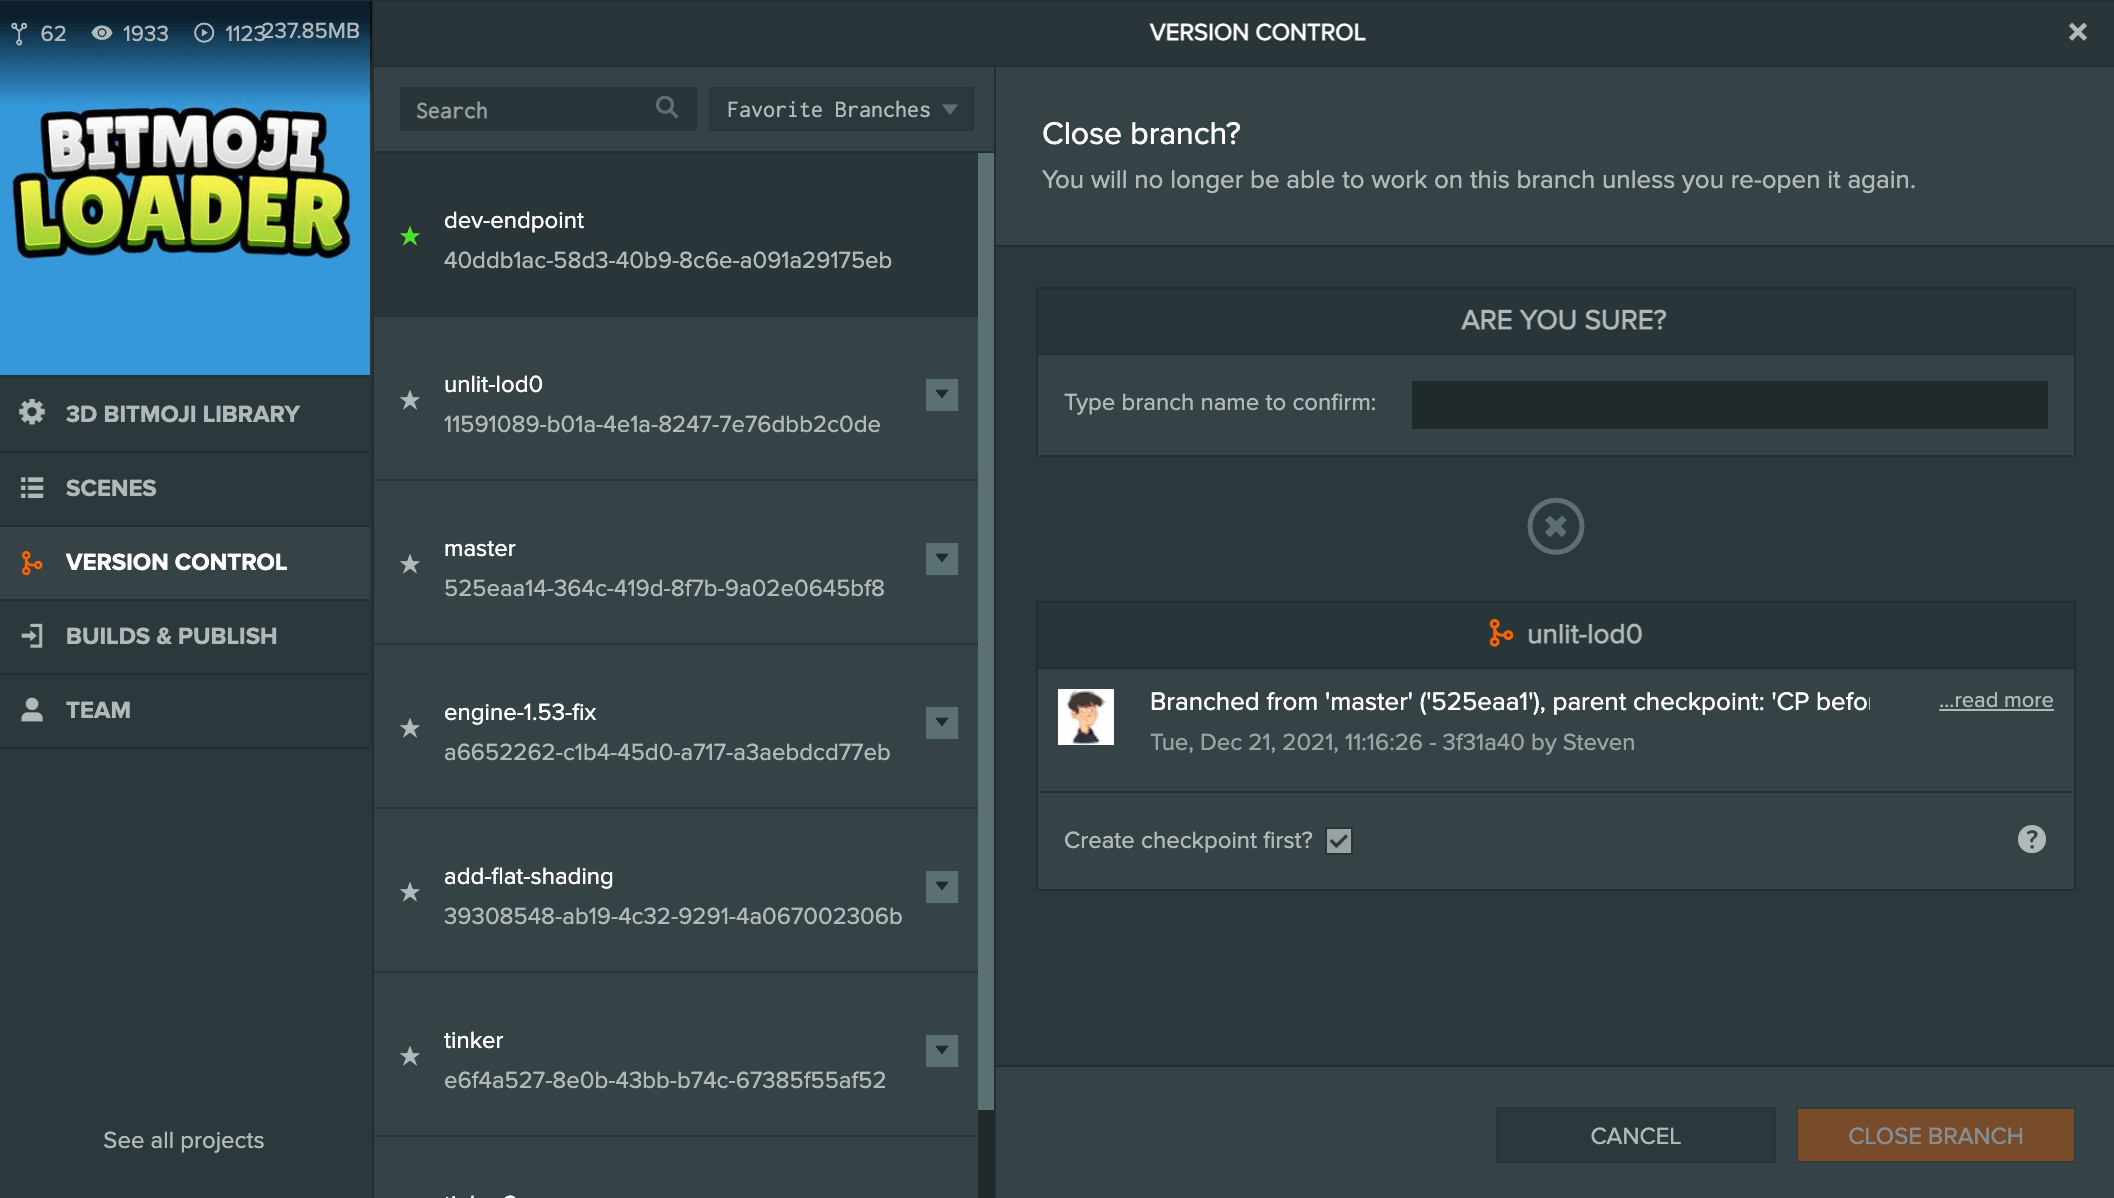
You will be asked to confirm the closing of the branch and you have an option to create a checkpoint before closing. This is enabled by default. If you wish to discard these changes you can untick the option here.
Note: Unticking this checkbox will lose any work you have made in the branch since you last made a checkpoint
Closed branches can also be reopened at a later date.
Deleting a branch
Deletion of branches are only supported if the following conditions are met:
- The branch has not been merged into another branch
- No branches have been created from this branch
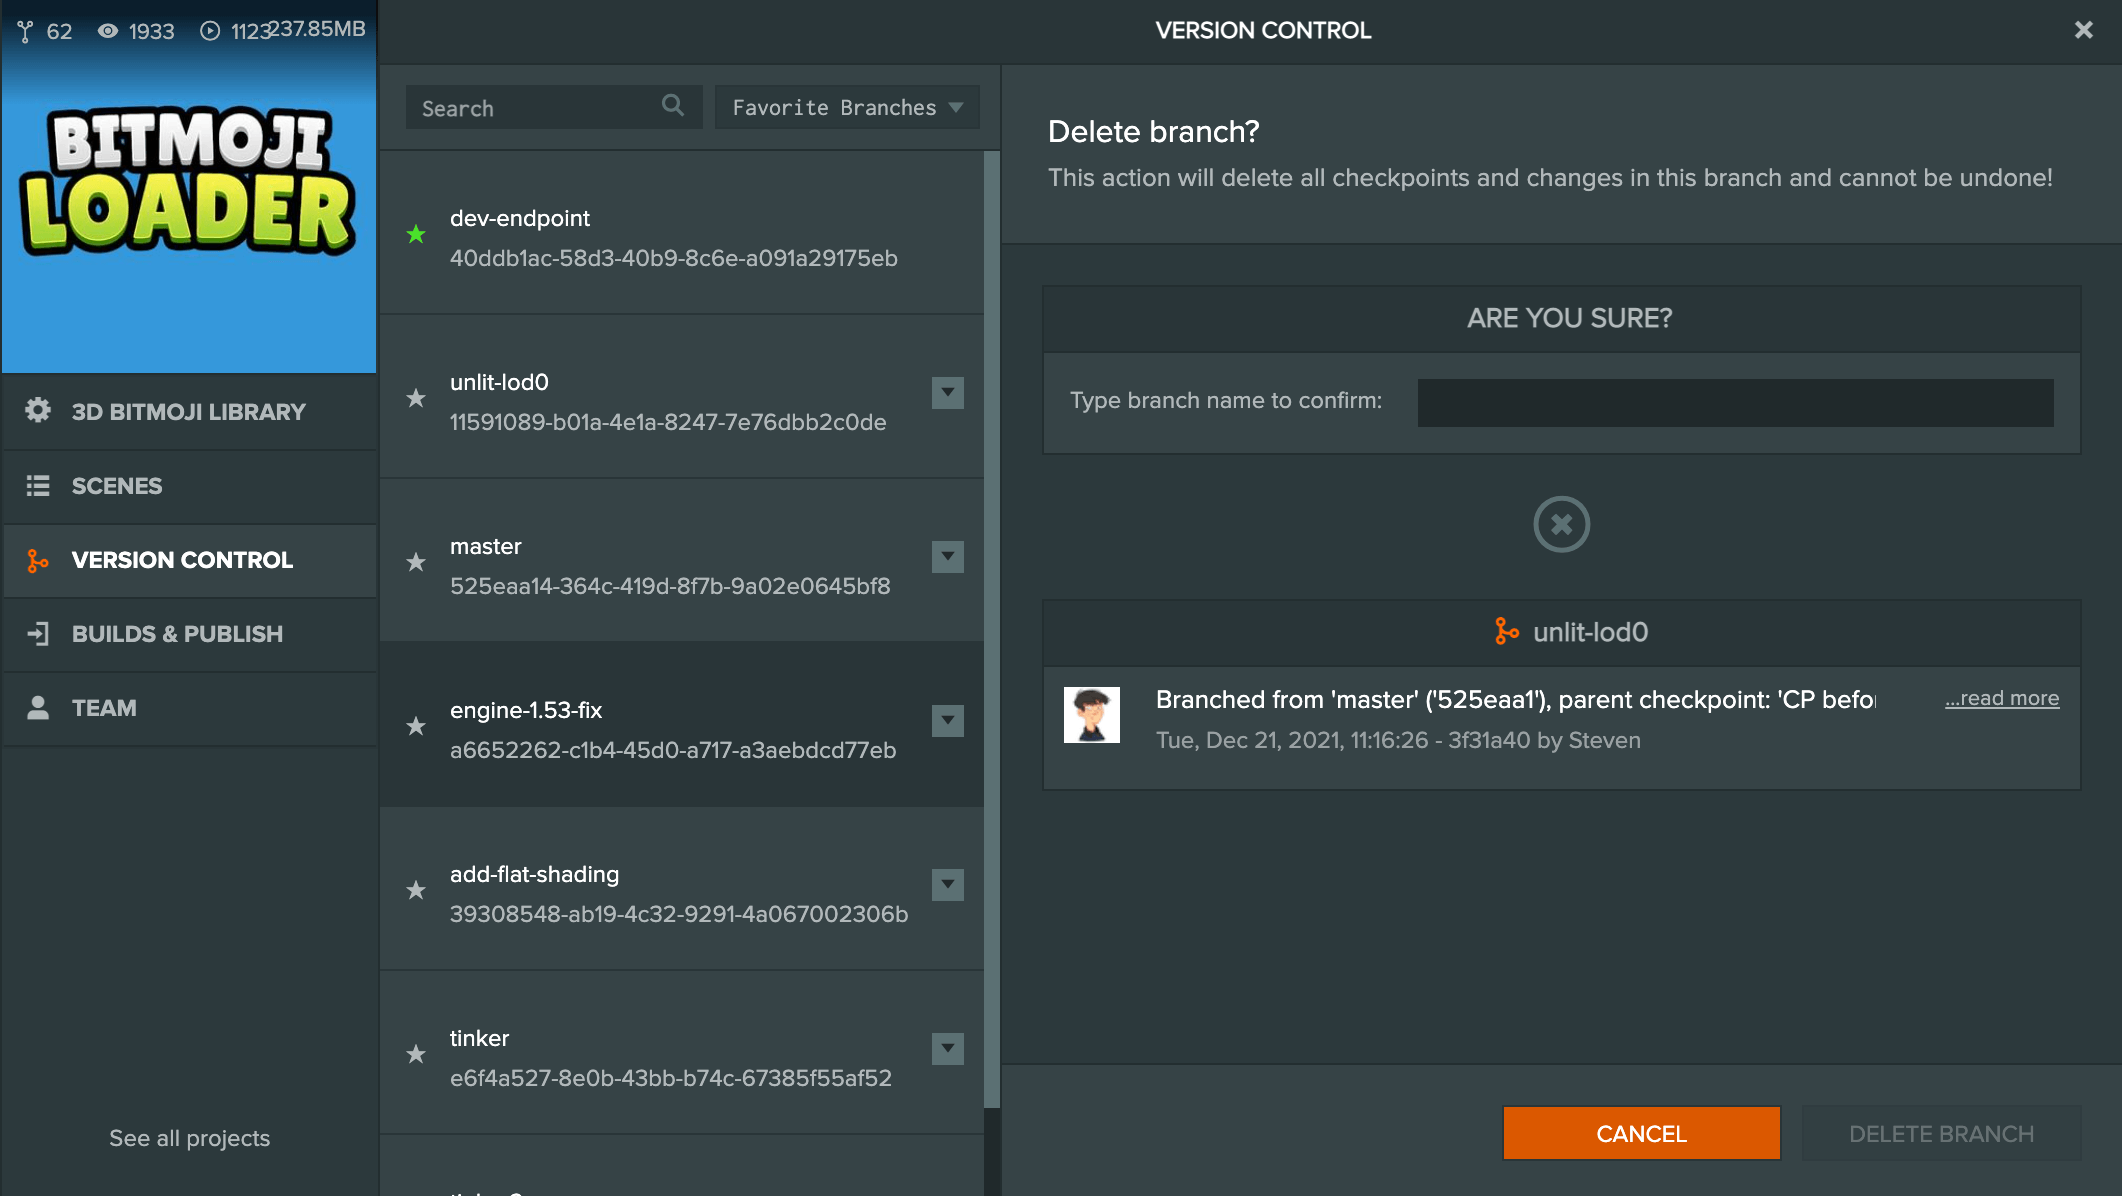
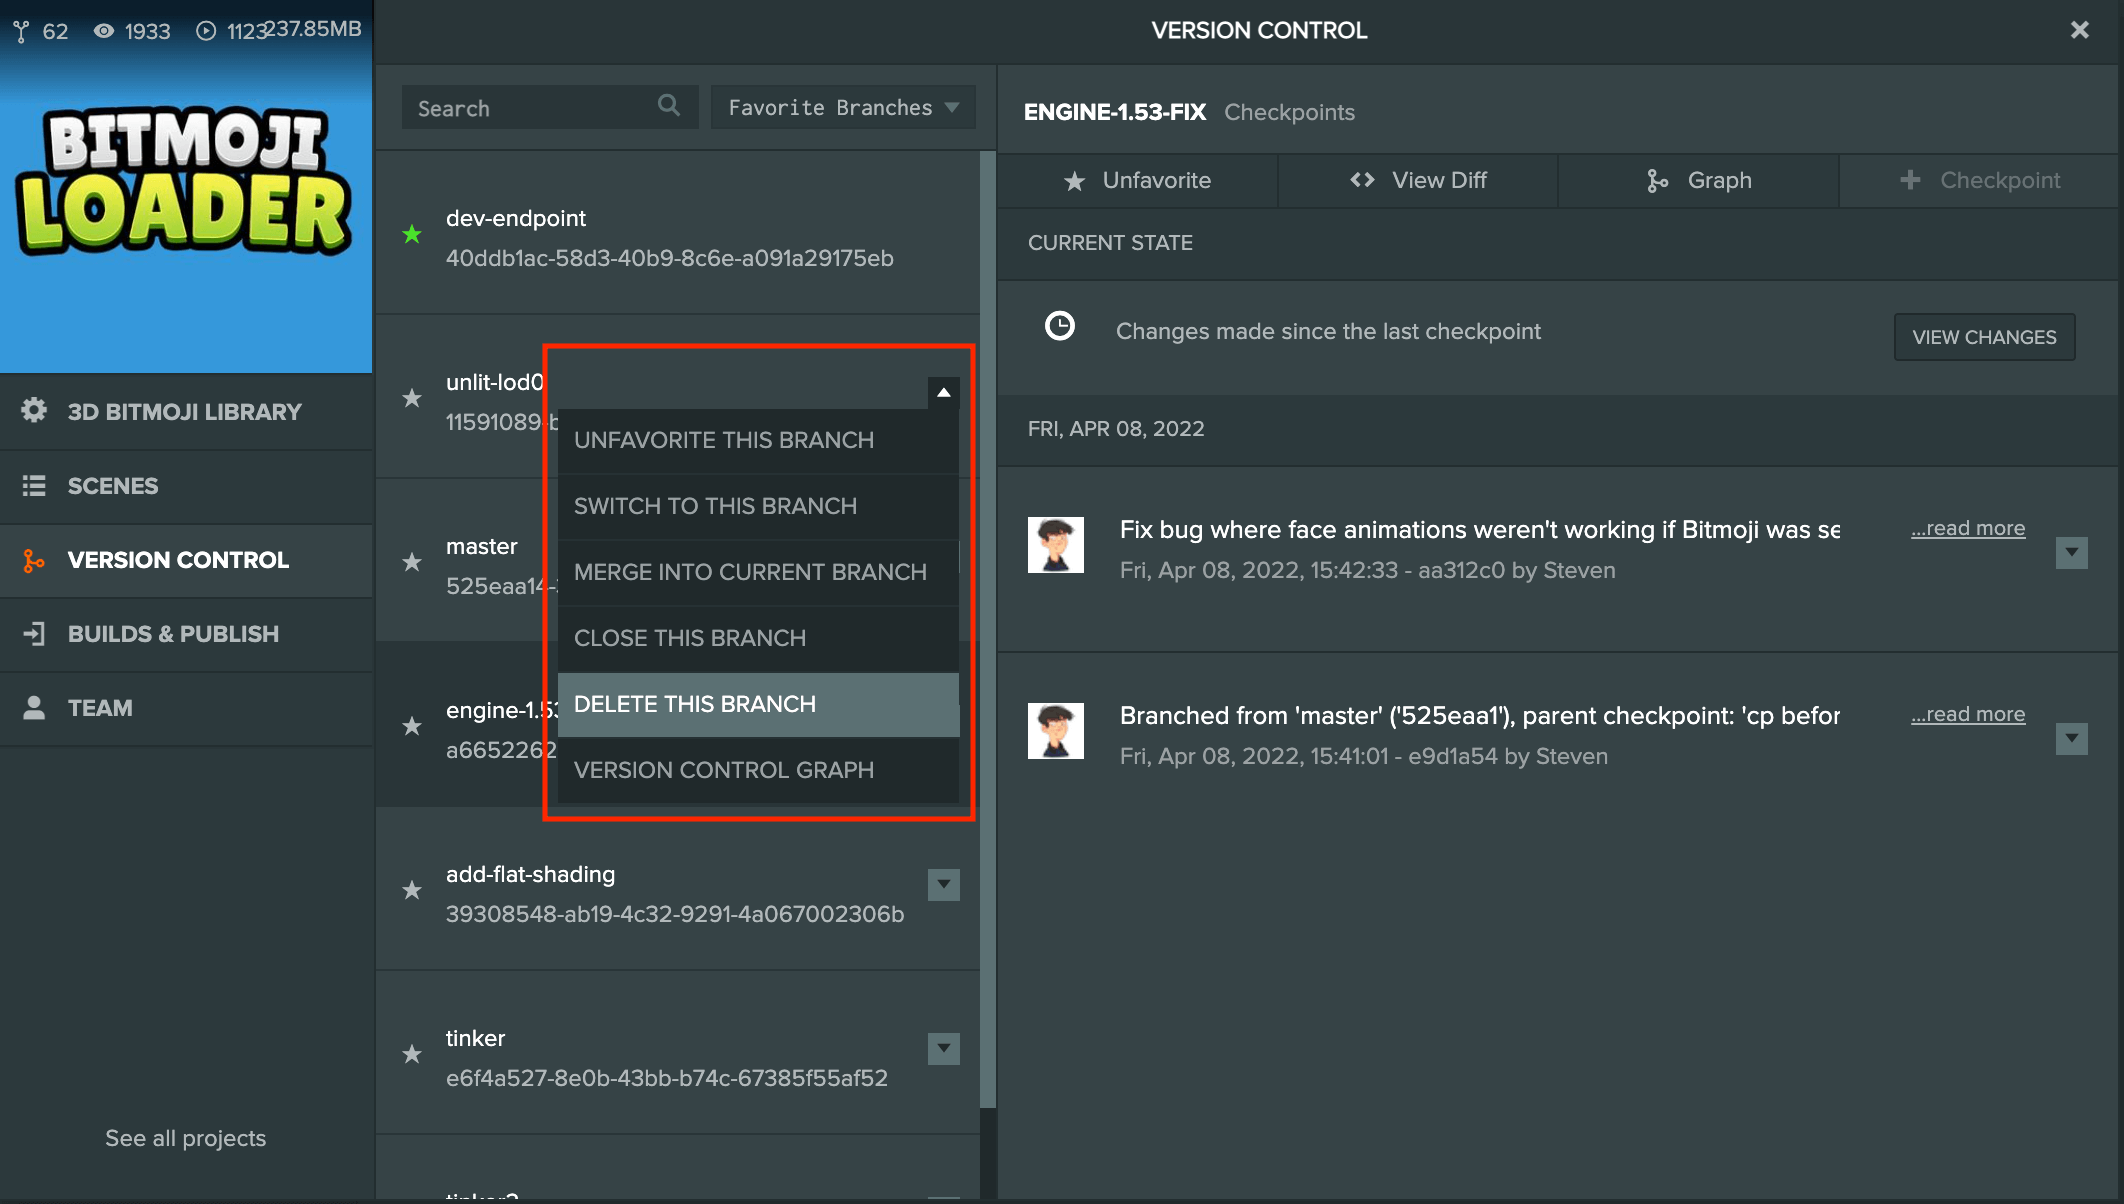
To delete a branch open the version control panel, select the branch you wish to delete and choose the "Delete this branch" option in the branch's drop-down menu.
You will be asked to confirm the deletion of the branch by typing the name of the branch in the dialog box.
Note, deleted branches cannot be recovered after deletion! If in doubt, please close the branch instead.