Assets
The Assets Panel manages all of the Assets that are available in your project. From here, you can create, upload, delete, inspect and edit any Asset.
Folder Hierarchy
The folder panel allows you to organize your assets into a tree of folders.
To create a new Folder, select the Add Asset (+) button and select 'Folder'. Alternatively, right click the folder where you would like a new folder to be created and select 'New Asset' > 'Folder'.
To rename a folder, double click it in the hierarchy panel and edit the Name field in the Inspector.
To delete a folder, double click it in the hierarchy and hit delete. Alternatively, right click the folder you want to delete and select 'Delete' from the context menu.
Folders can be drag and dropped into each other if you want to reorganize your folder structure.
Creating and Uploading Assets
You can create new assets by dragging a file from you computer's file system into the Assets Panel. The Editor will upload and import the asset for you.
You can also create certain assets types using the Add Asset (+) icon.
You can delete assets by selecting them and clicking the Delete Asset icon.
Editing Assets
Certain text-based assets can be opened and edited in the PlayCanvas Script Editor: text, json, shader, html, css and script assets. To do this, simply double click on the asset's thumbnail.
Inspecting Assets
To inspect the details of any given asset, select its thumbnail in the Assets Panel. The asset's details will be displayed in the Inspector.
Filtering
Filter which assets are visible using the filter drop down to select the type of asset to view.
Searching
You can perform a global search for assets in your project using the Search box. Simply start typing into the box and the Editor will show matching results dynamically in the Assets Panel.
ID - Specific asset can be found by its unique ID, by simply typing ID in search field it will recognize exact match and only show one asset with that ID.
RegExp - It is possible to search using regular expressions. Add * at the beginning of search field and type regexp
query after. To search for all assets use *. (any character) regexp query.
Tags - To search by tags and their combinations type tags in square brackets [ ]. Simple query operators: AND, OR
are allowed by expressing query as array of strings or other arrays with strings. Logic of query is same as for findByTag from AssetsRegistry.
Here are some examples:
[ level-1 ] - returns all assets that are tagged by level-1.
[ level-1, level-2 ] - returns all assets that are tagged by level-1 OR level-2.
[ [ level-1, monster ] ] - returns all assets that are tagged by level-1 AND monster. Notice extra brackets.
[ [ level-1, monster ], [ level-2, monster ] ] - returns all assets that are tagged by (level-1 AND monster) OR (level-2 AND
monster).
Drag and Drop
Assets can be moved to different folders by dragging them from the main panel to a folder in the folder hierarchy. Note that assets support multi-selection. Pressing CTRL+A will select all assets in the currently selected folder.
You can also drag Assets from the Asset Panel to highlighted slots in the Inspector. Slots in the Inspector will either be asset attributes of components or asset-type script attributes.
You can also drag model, material, and cubemap assets directly into the Viewport
- If you drag a model asset into the Viewport, a new entity will be created with a model component with the model asset assigned. The viewport camera will automatically zoom to the newly created entity.
- If you drag a material over a particular mesh instance in the Viewport, its material will be switched (as a preview) to the material being dragged. To make the material change stick, simply drop the material.
- If you drag a cubemap over the background of a scene in the Viewport, the cubemap will be assigned as the skybox cubemap of the scene. This property can also be set from the Scene Settings.
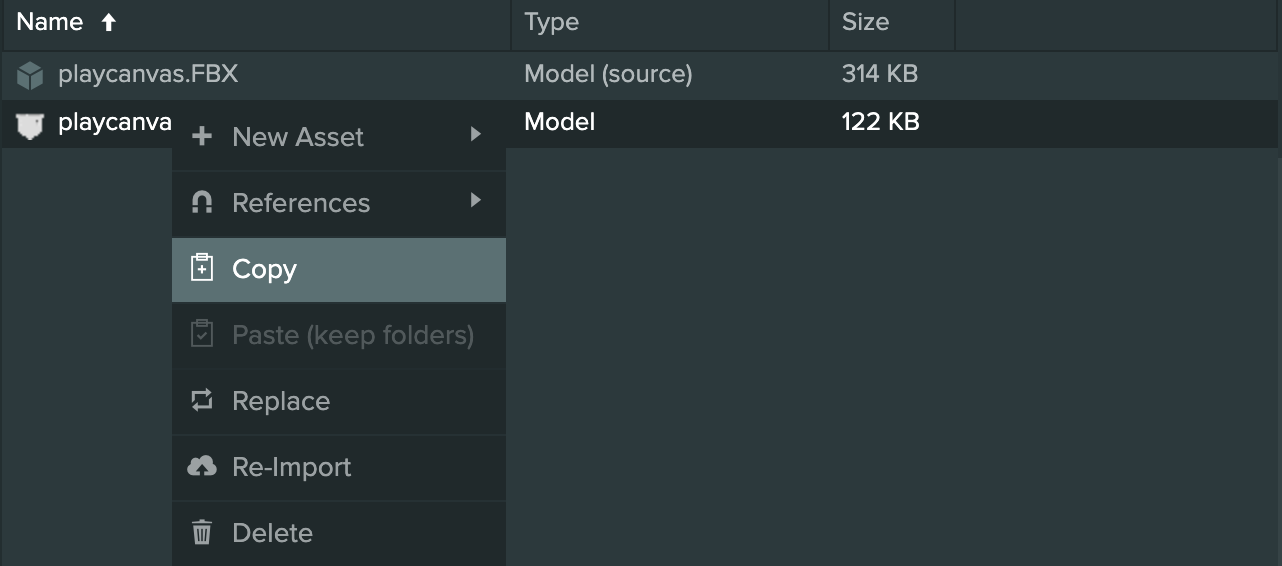
Copy and Paste between Projects
To copy an asset or a selection of assets between projects, select the asset(s) and right-click to bring up the context menu to select 'Copy'. You can also use the hotkey Ctrl/Cmd + C instead if the context menu is not available due to being a read-only project.
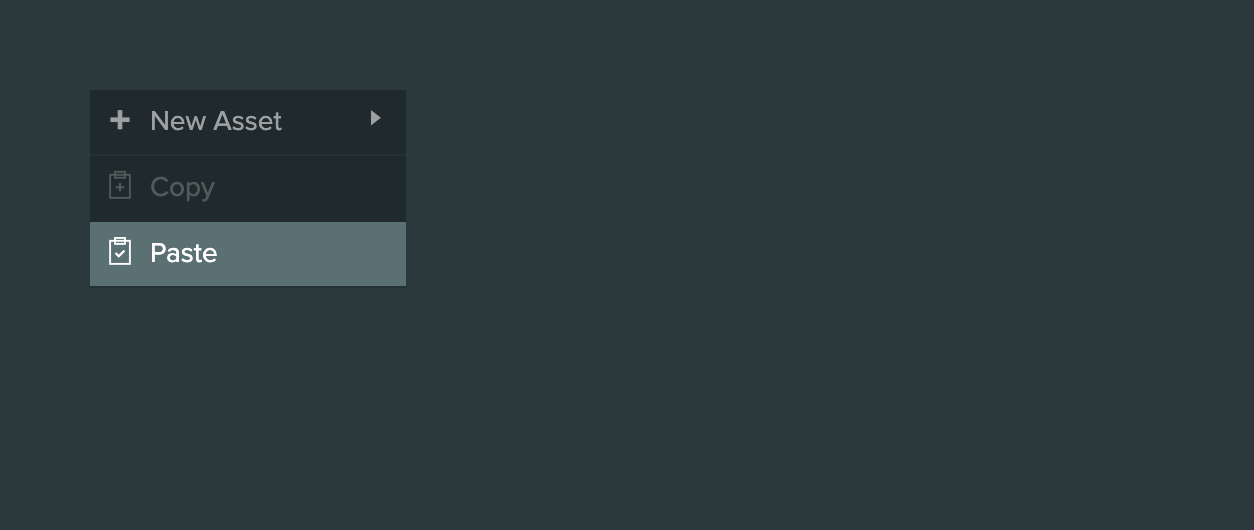
In the project that you want to copy the asset(s) to, right click in the assets panel and select 'Paste'. Ctrl/Cmd + V hotkey can be used instead.
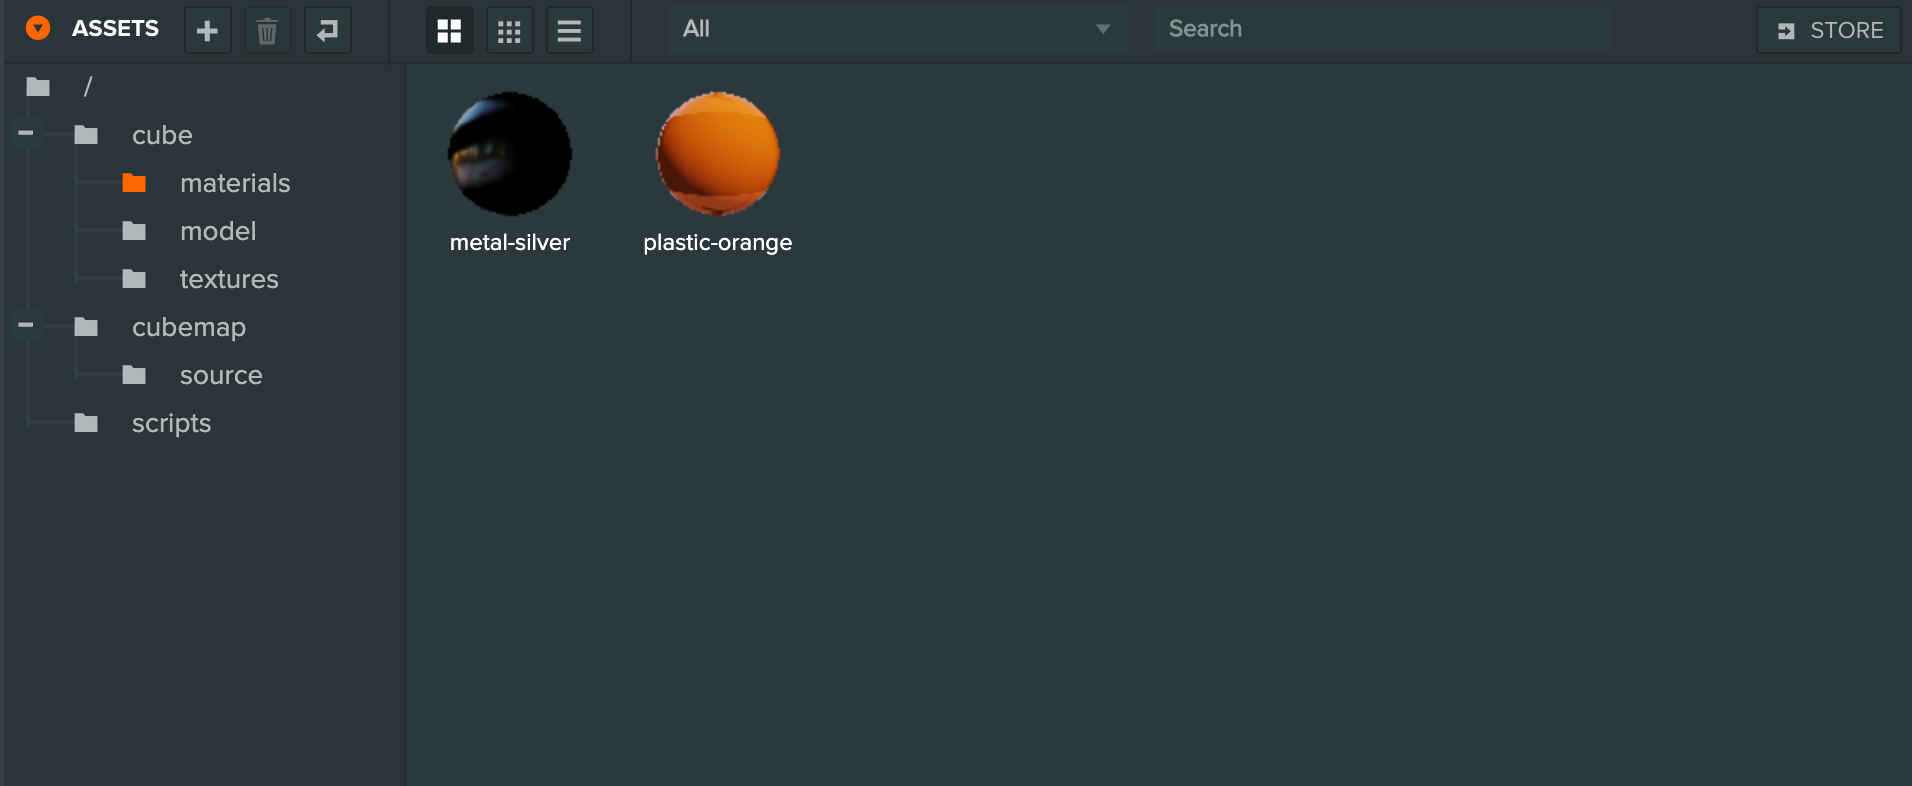
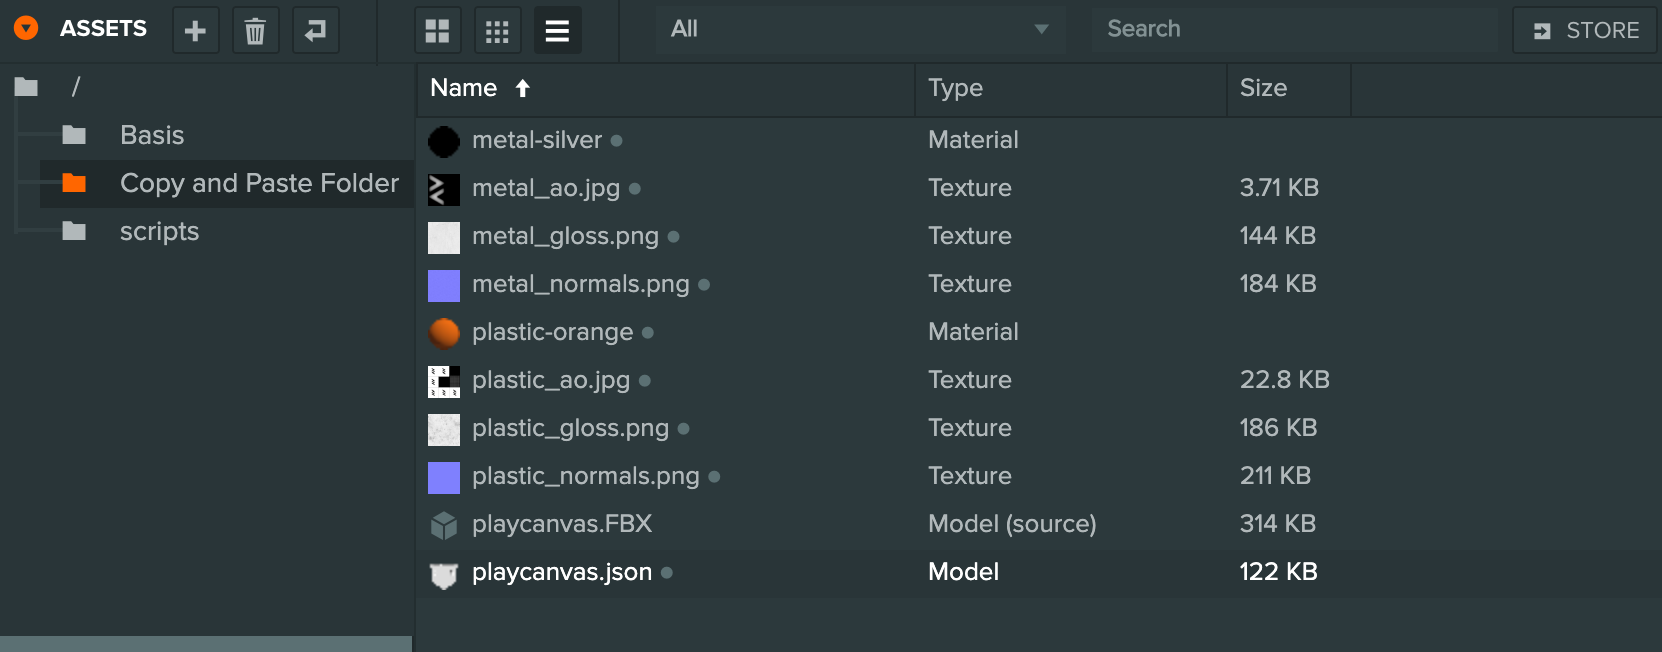
Copy and pasting an asset will also copy its asset dependencies too. For example, here we have a model which references two materials and they reference a set of textures.
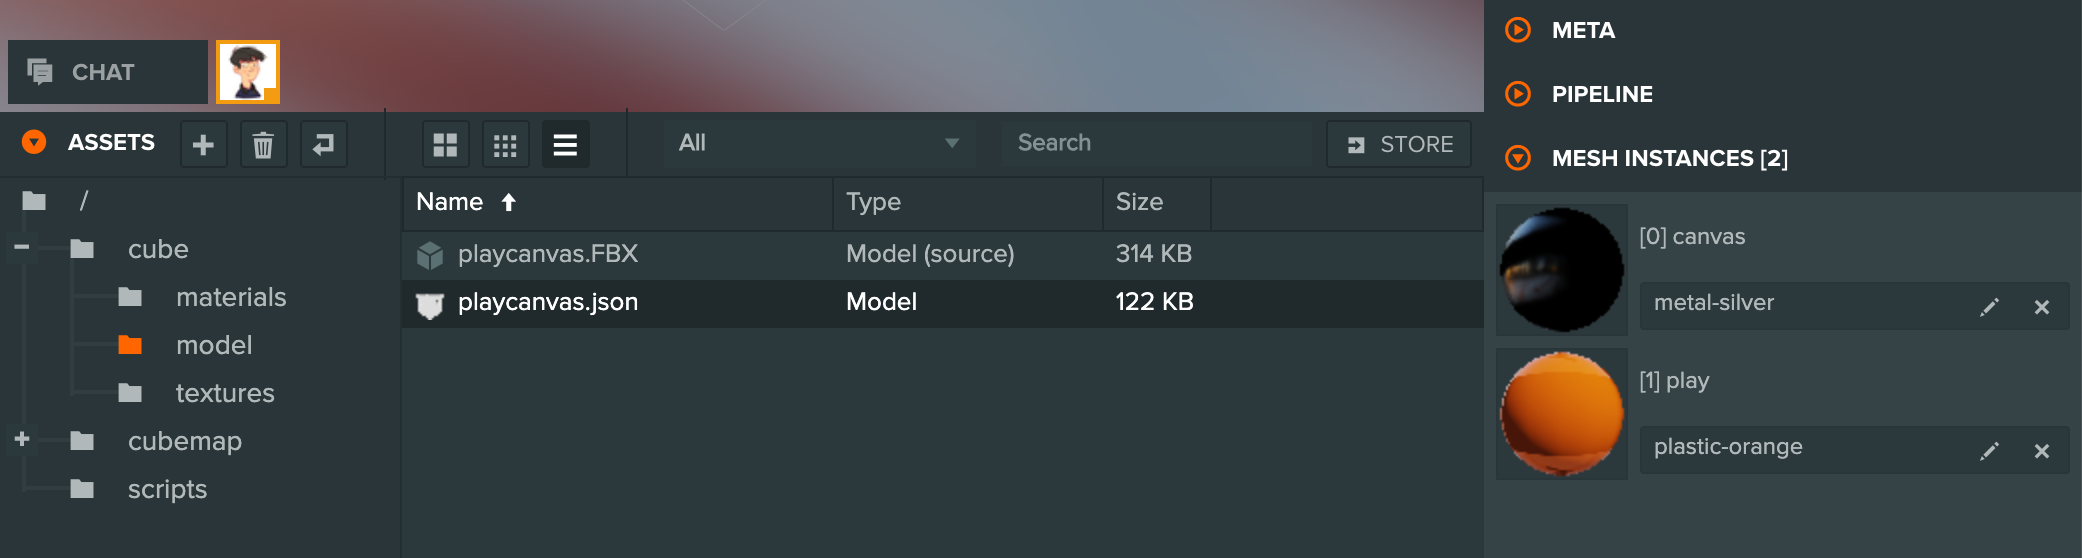
If you copy and paste just the model asset into a different project, those asset dependencies are copied too.
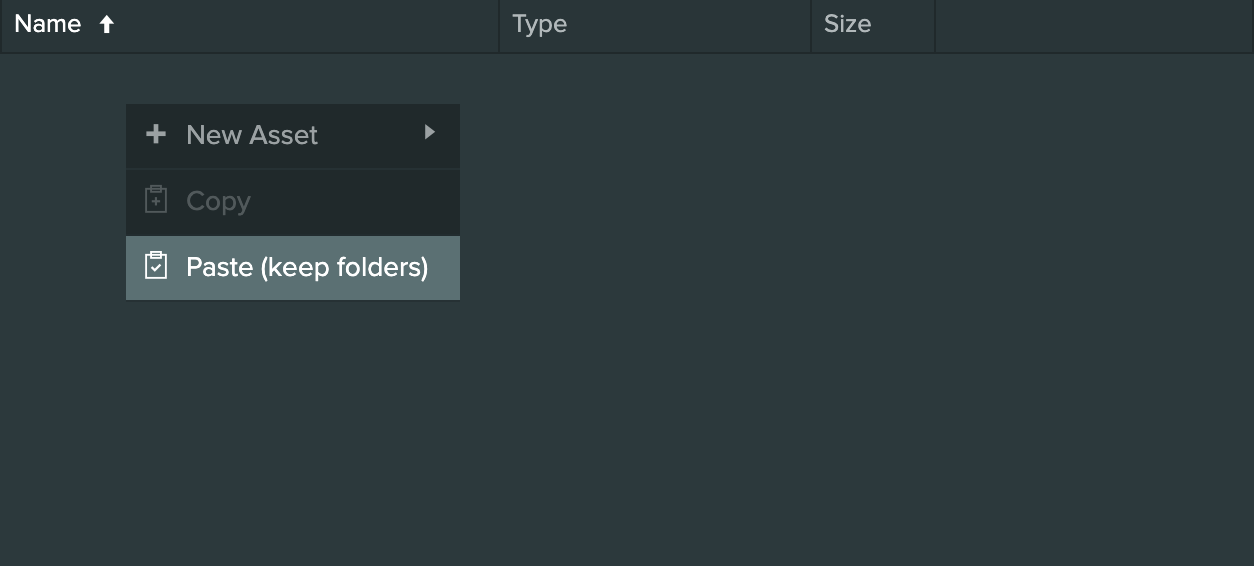
By default, it is pasted as a flat hierarchy. If you want keep the folder structure, hold Shift when the context menu is opened and an option will appear called 'Paste (keep folders)'. This will attempt to keep the folder structure using the folder you are pasting into as the root folder.
Will result in the following where the folder structure is preserved:

We generally recommend that if you will be using this feature for reusable libraries and assets, to keep it contained to a root level folder that can be easily copied and pasted to other projects. This will keep the folder structure of projects simpler and cleaner.
Checking References
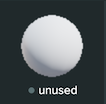
Sometimes it's useful to know where assets are being used (or referenced) within a particular scene. If the Editor cannot detect any references for an asset, a small dot will be displayed on its thumbnail:
If an asset does have references, you can check them via the References content menu item:
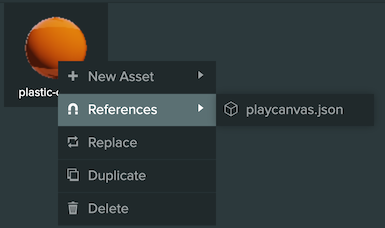
Selecting a reference will load it into the Inspector panel.