Merging and resolving conflicts
Merging is the process by which you combine work that has been performed in one branch with work that has been performed in another branch. Merging is a natural part of the branch based workflow described in the branches documentation.
Merging two branches
In PlayCanvas a merge takes two checkpoints from two different branches, calculates the changes that have occurred since their last shared ancestor checkpoint, combines these changes together (sometimes asking for help to resolve conflicting changes) and finally creates a new checkpoint containing the result of the merging of the two checkpoints.
First, it's important to note that when you perform a merge in PlayCanvas you are not actually merging two branches. You are, in fact, merging two checkpoints. This is relevant because you may have changes in one of the two branches that are more recent that the latest checkpoint. In the case of the branch you are merging into PlayCanvas will automatically create a checkpoint to ensure you do not lose any changes.
Example merges
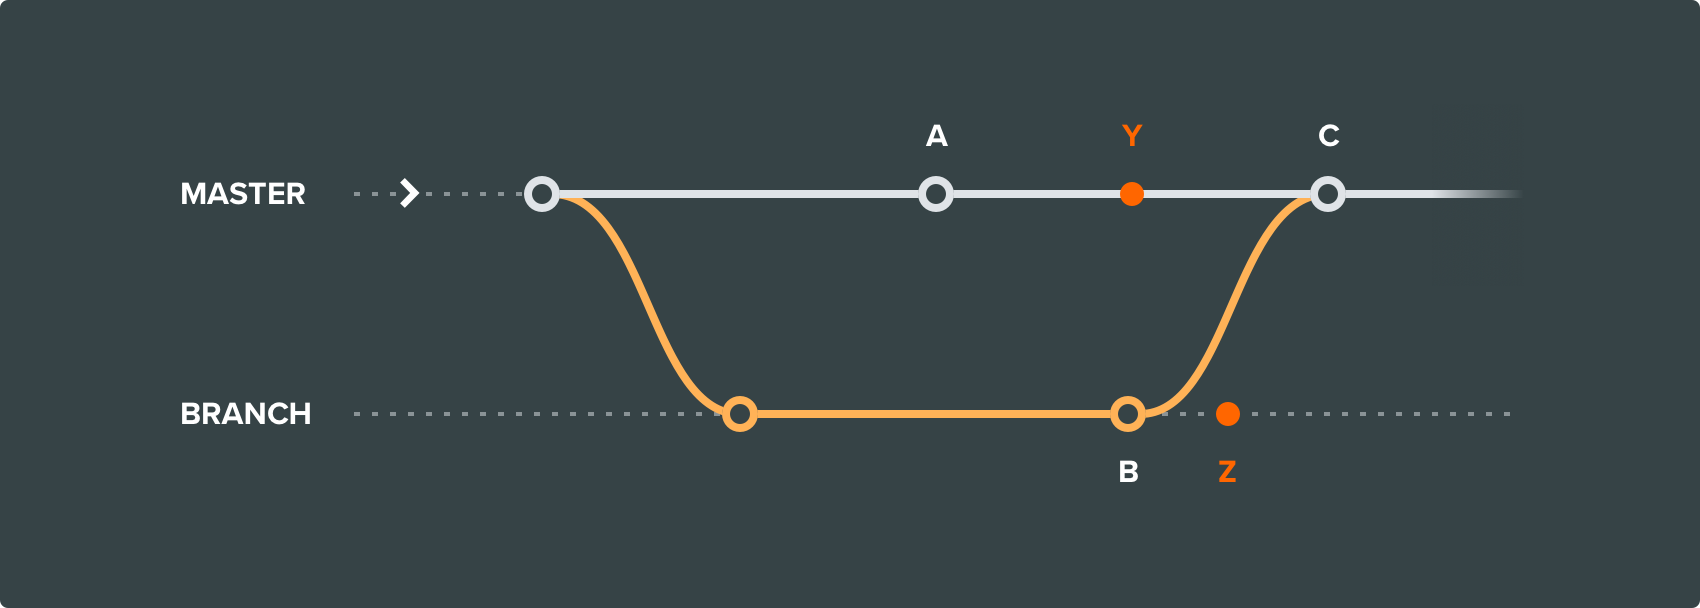 Changes Y & Z are not included in merge result C and are lost.
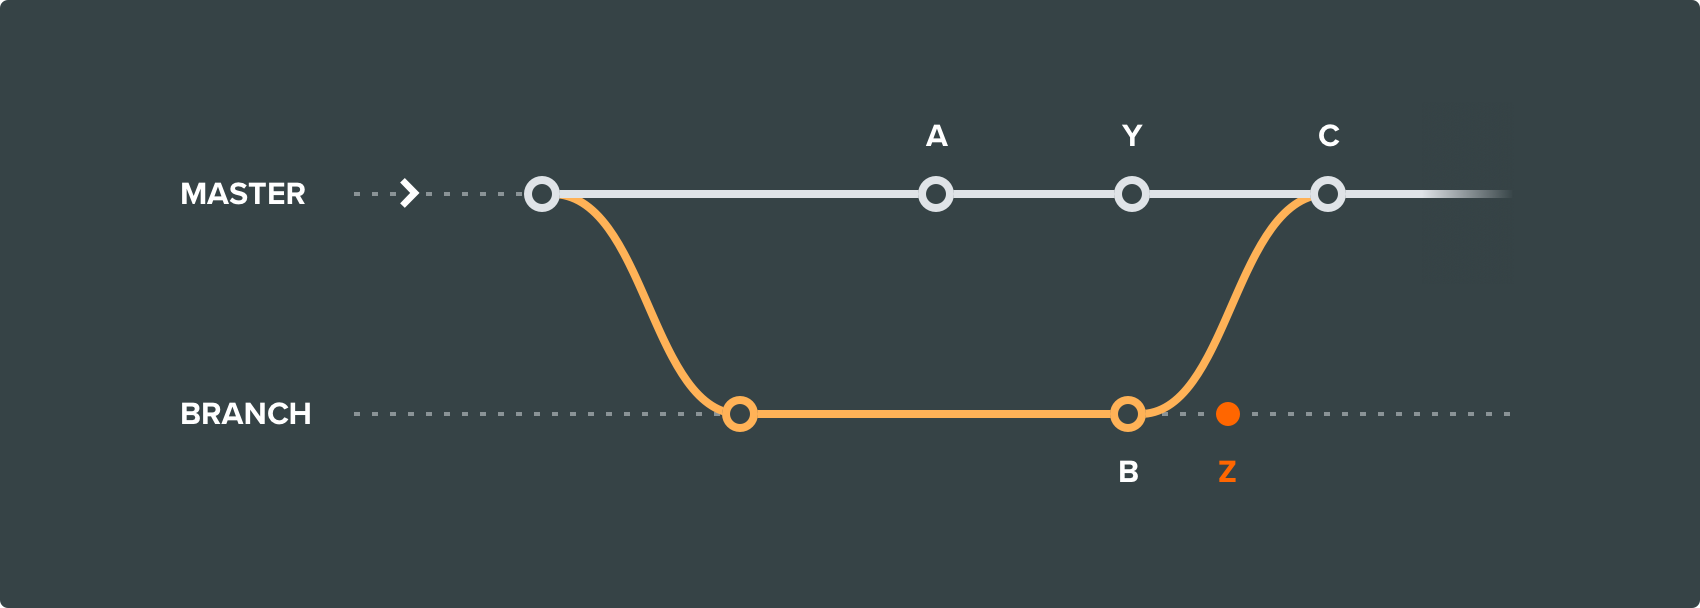 By default PlayCanvas creates a new checkpoint in the destination branch of a merge, so changes Y are included
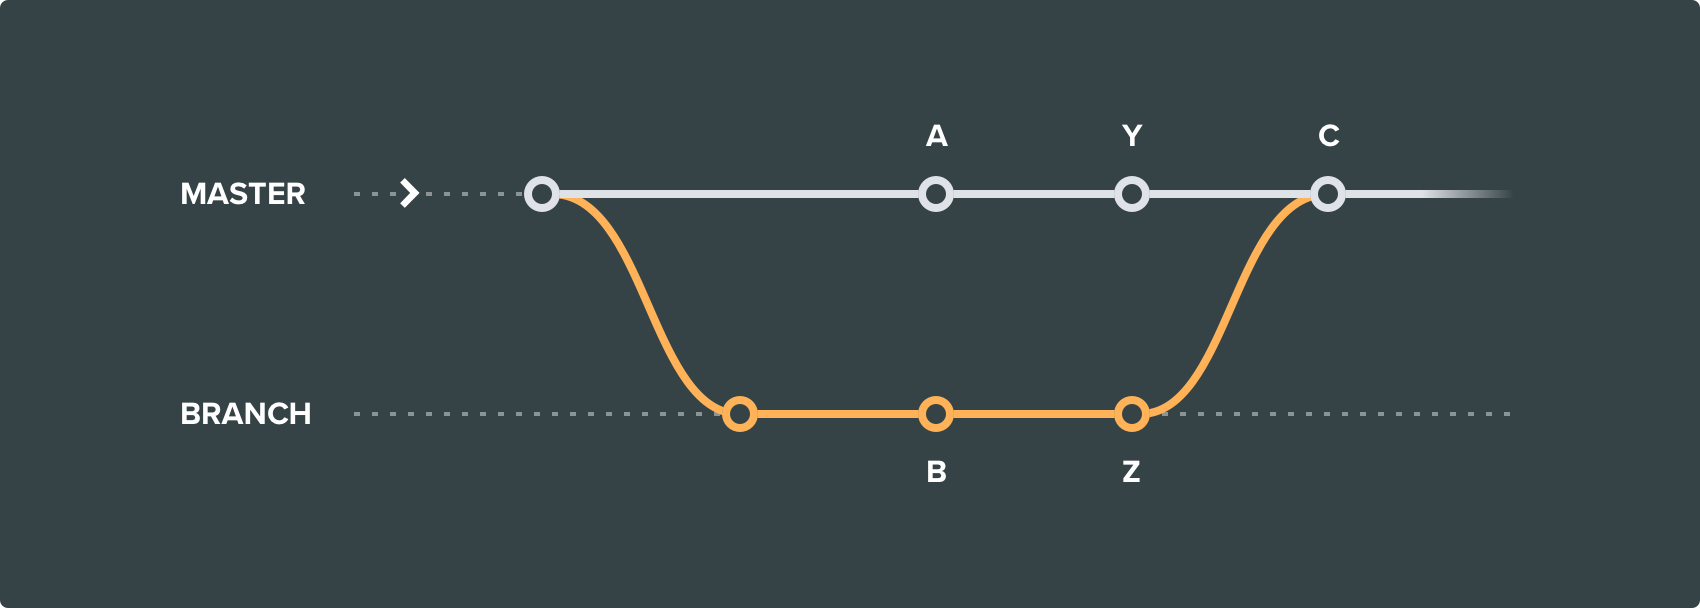 If changes Z are required, create a checkpoint in the source branch before starting the merge.
Starting a merge
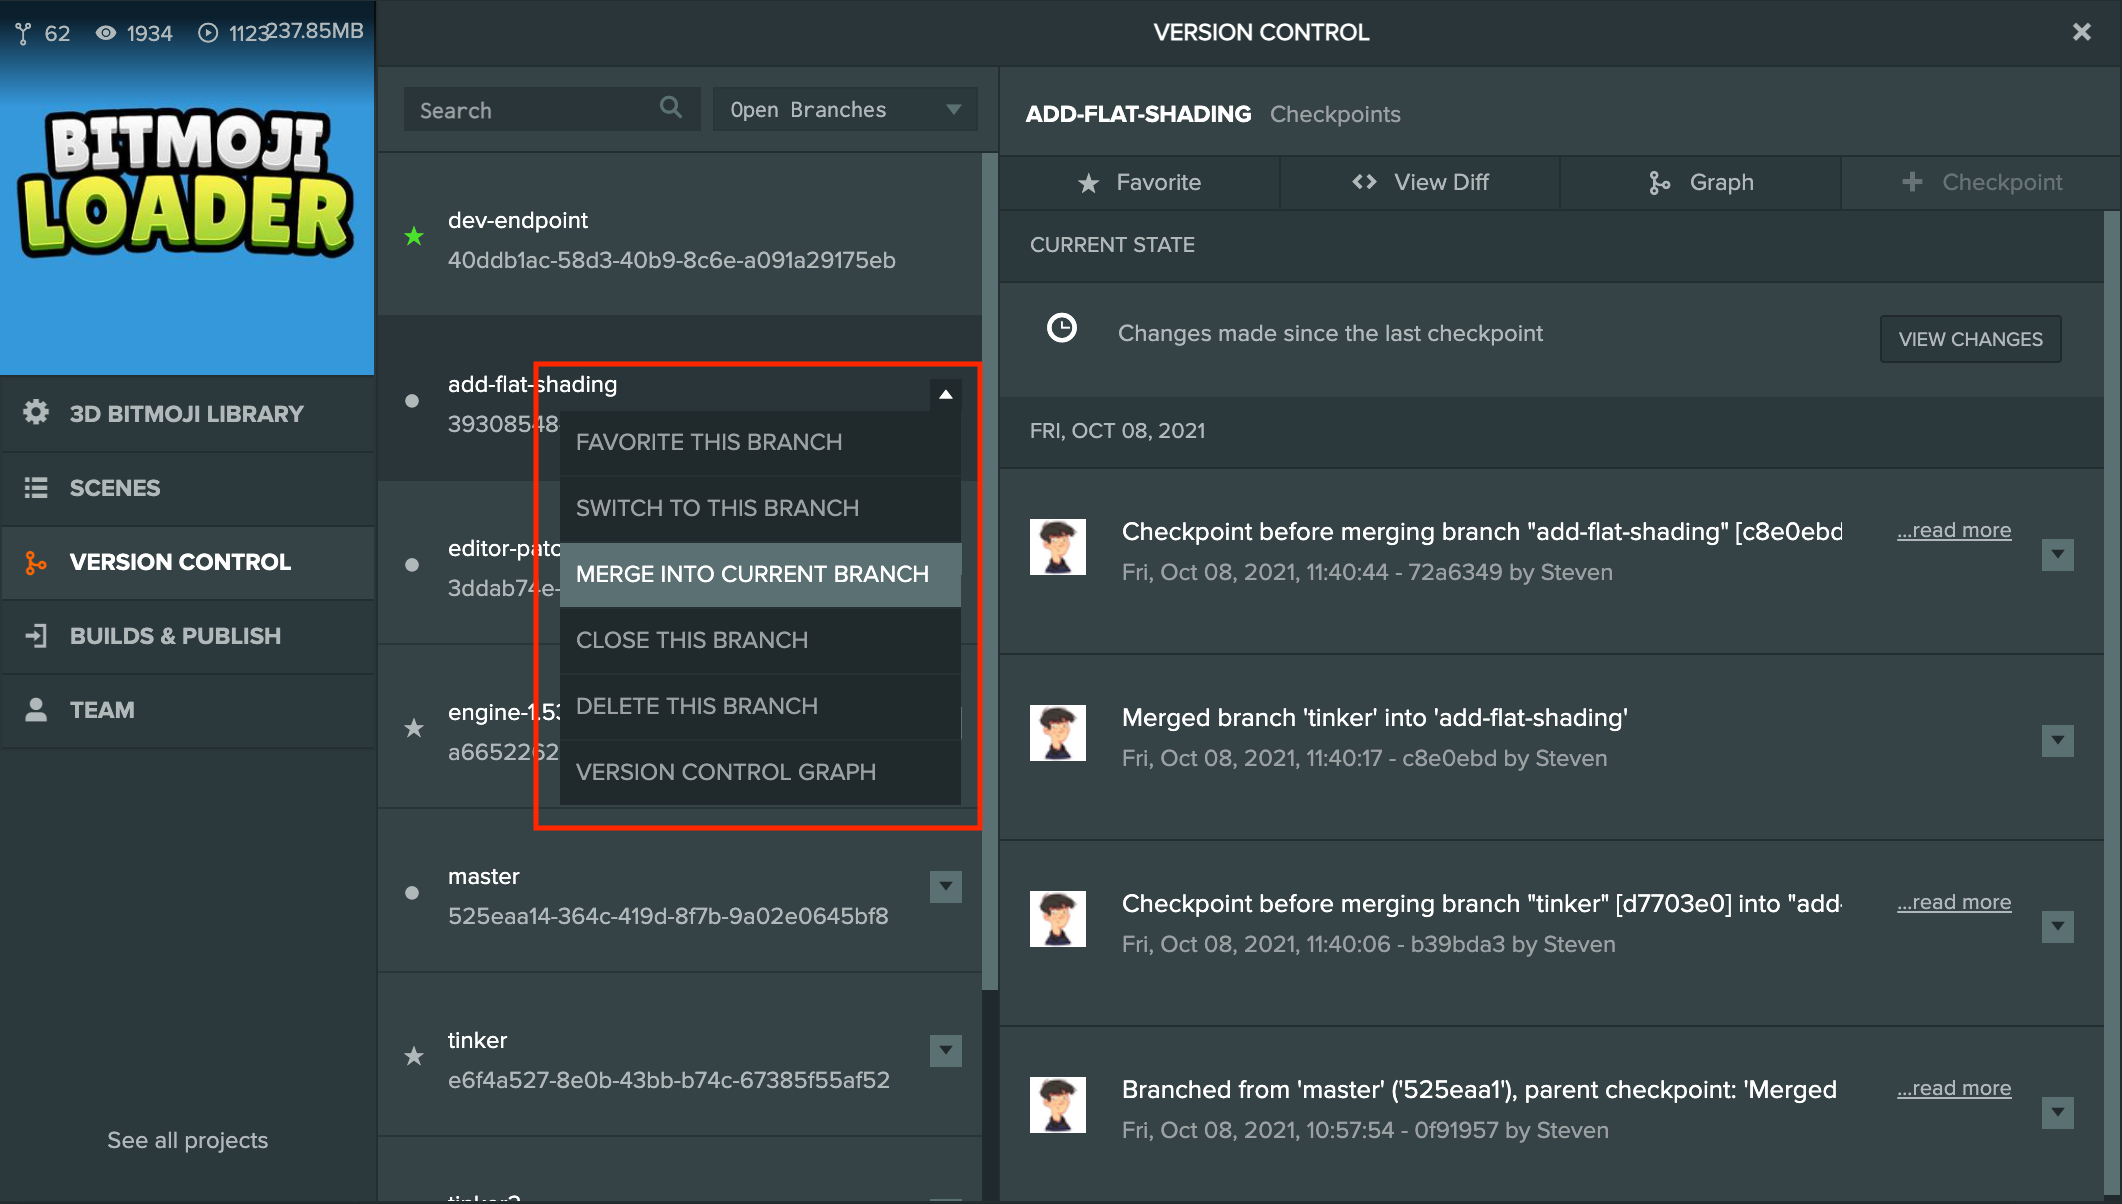
To start a merge switch your current branch to the branch you wish to merge into. Then select the branch that you wish to merge from and choose "Merge into current branch" from the branch's drop-down menu.
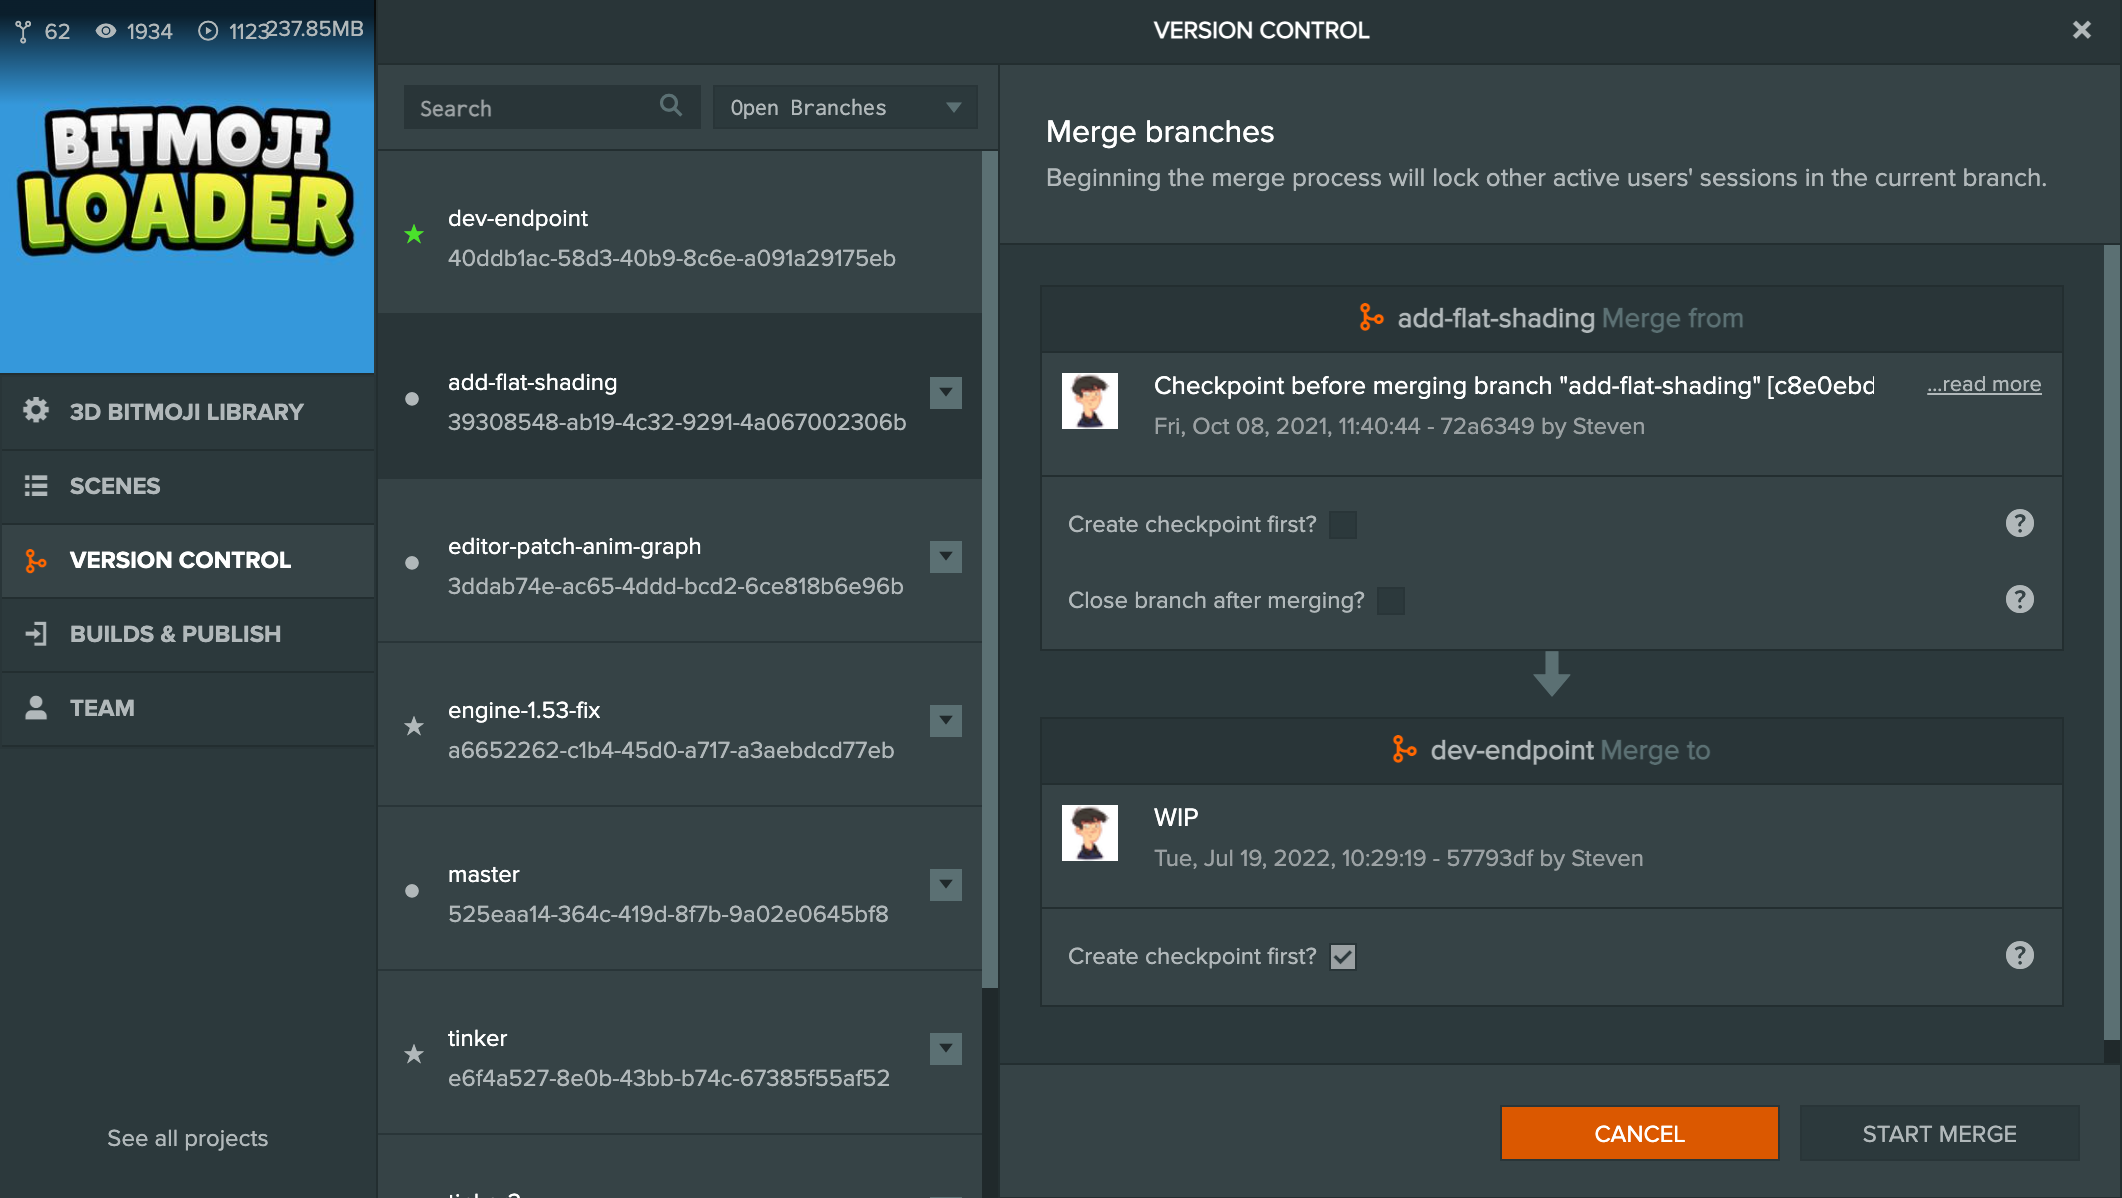
You have a few options before starting the merge.
On the 'Merge from' branch, you can:
- Create checkpoint first - Tick this option to create a checkpoint before the merge. This is useful if there are changes in the branch that have not yet been checkpointed and you want to include them in the merge.
- Close branch after merging - Tick this option to close the 'Merge from' branch after the merge is completed. This is commonly used for feature branches where the feature is completed and to keep the branch list clean from stale/old branches.
On the 'Merge to' branch, you can:
- Create checkpoint first - This is ticked by default. As merges are based on checkpoints (i.e. it merges one checkpoint to another), this ensures that any changes on the 'Merge to' branch that aren't checkpointed, will be included in the merge. Unticking this option will discard any changes that are not checkpointed. It is recommended to not untick this option.
Automatic Merging
When you merge two checkpoints PlayCanvas will try to automatically merge any changes from the two branches that don't conflict with each other. In many cases, two branches can be merged completely automatically. In an automatic merge once the merge is complete the Editor will reload with your merged changes in the current branch.
Resolving Conflicts
Sometimes the two branches have conflicting changes which cannot be automatically merged. An example of a conflicting change is if both branches have changed the position on the same entity. It's not possible for the system to make a choice between the two final positions.
If one or more conflicts exist when merging two branches the Editor will show the conflict manager and you must resolve each conflict before the merge can be completed.
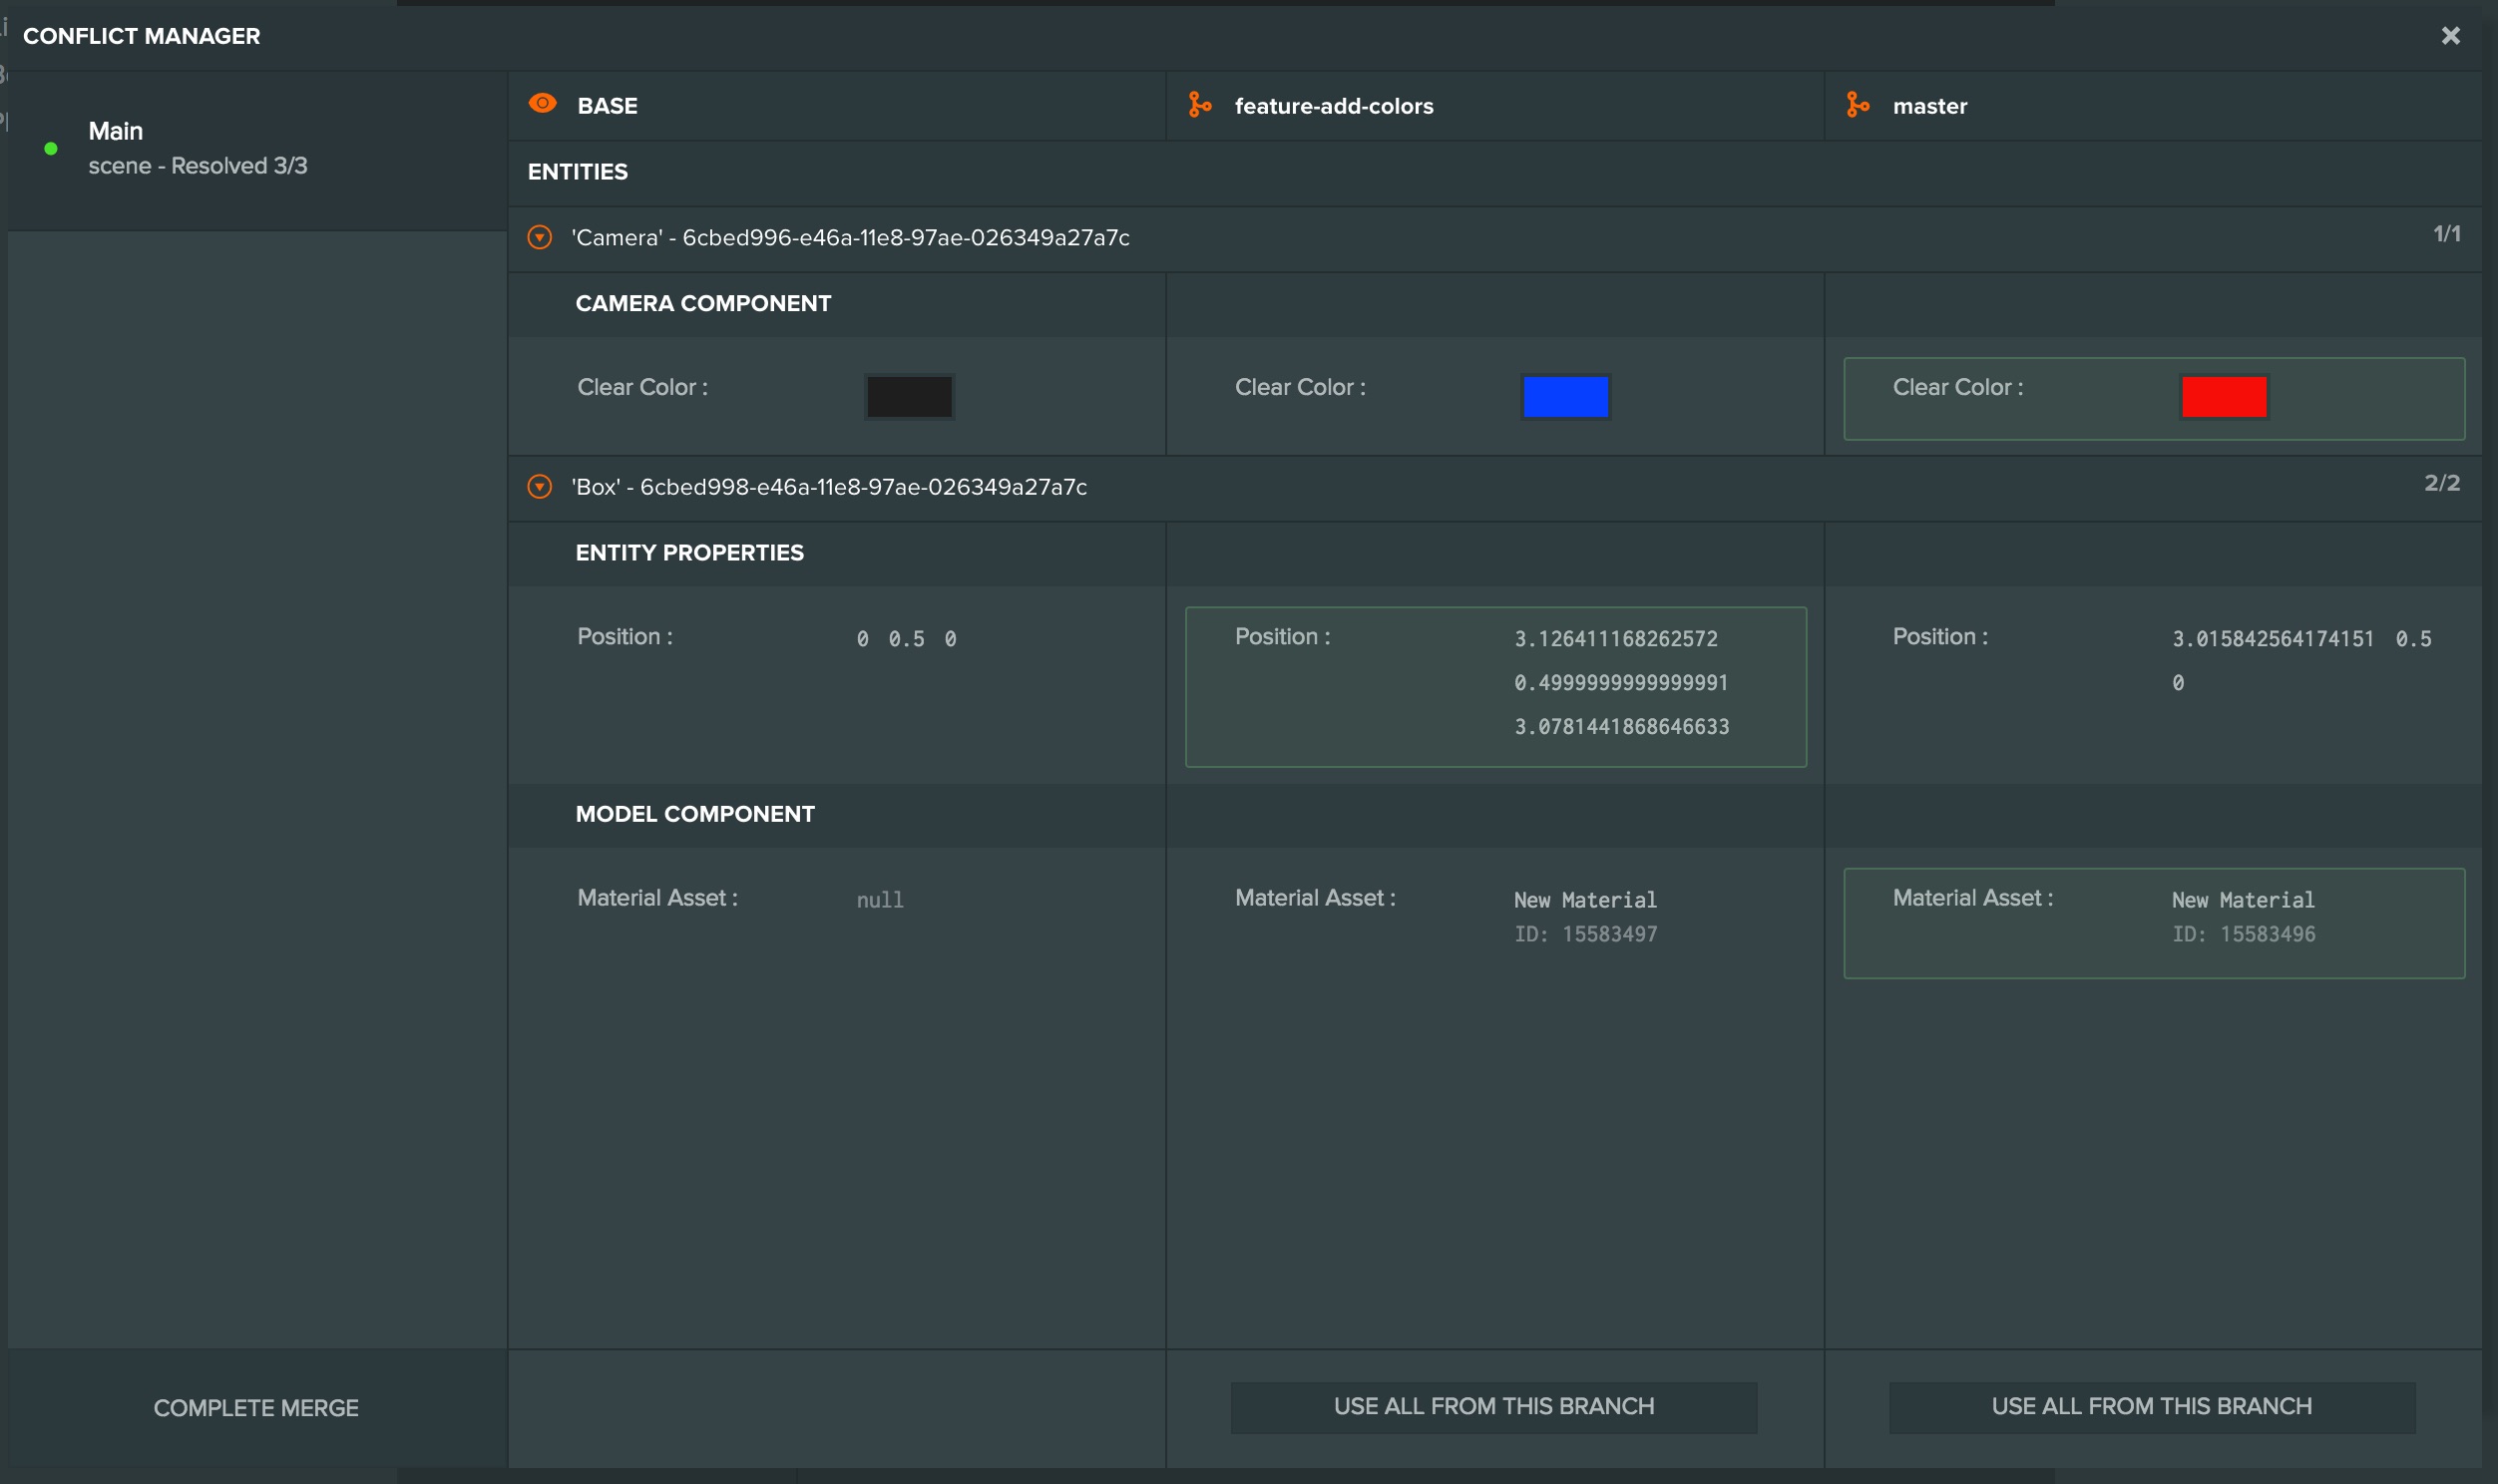
Conflict Manager

The conflict manager shows each resource that is in conflict on the left, and for each selected resource a comparison between the original version (the Base) and the version in each branch. For each conflicted property you can choose which version to accept. Once all properties for all resources have been resolved you click the "Complete Merge" button to finish the merge and create the new checkpoint.
While the conflict manager and the merge is in progress your current branch is locked to further edits from other users. This prevents changes being overwritten by your merge when you finish resolving the conflicts. If another user has blocked a branch you need with a merge, you can forcibly end their merge from the editor.