Touchscreen Joypad Controls
Click here to see the project.
Overview
This tutorial shares a Touchscreen Joypad library that can be installed and customized for any project that needs touch screen controls.
We recommend reading about the PlayCanvas UI system if you have not used it before as it is used to render and position the controls for this library.

How to install
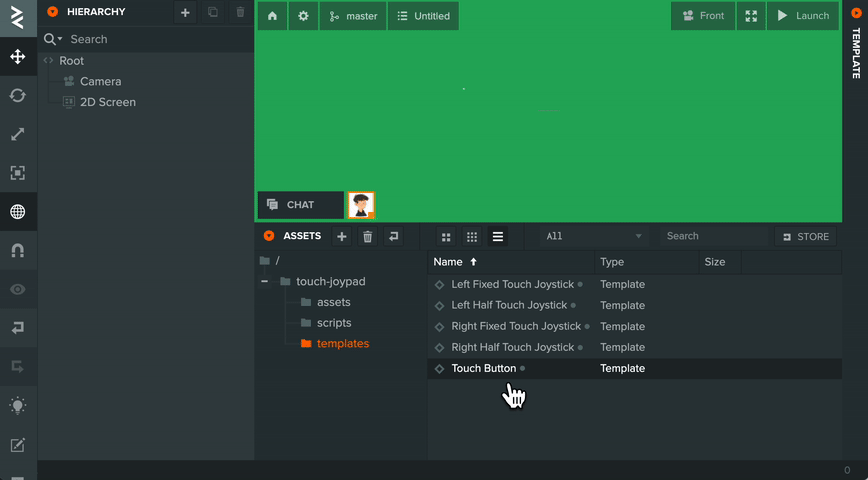
Open the example project, right click on the folder
'touch-joypad' and click on 'Copy'.
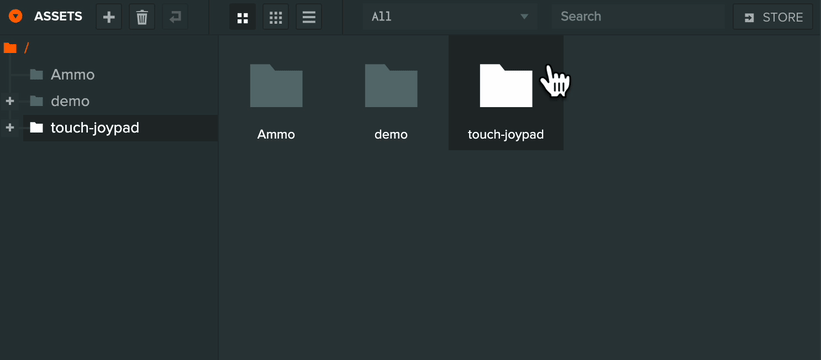
Open your project, right click in the assets panel and click on 'Paste'
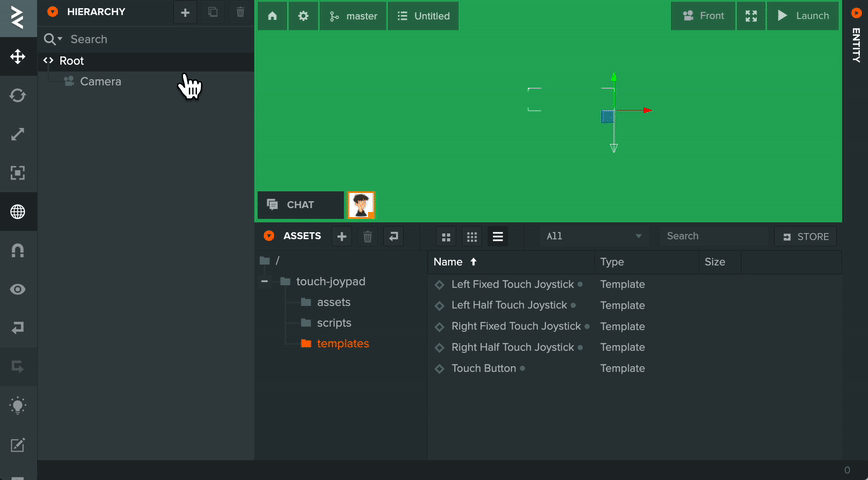
Adding your joystick
In the folder we've just pasted, open the 'templates' folder and there will be 4 preconfigured templates for the joysticks to cover the most common use cases.
- Left/Right Fixed Touch Joystick - A fixed joystick that is anchored to the bottom left/right of the screen corners. Recommended for quick reaction games where an instant response is expected such as a retro platforming game.
- Left/Right Half Touch Joystick - A joystick where the input area the left/right half of the screen and the joystick will move to where you touch in that area and them requires dragging for movement. Recommended for when 'pushing' or 'pulling' an object in the application.
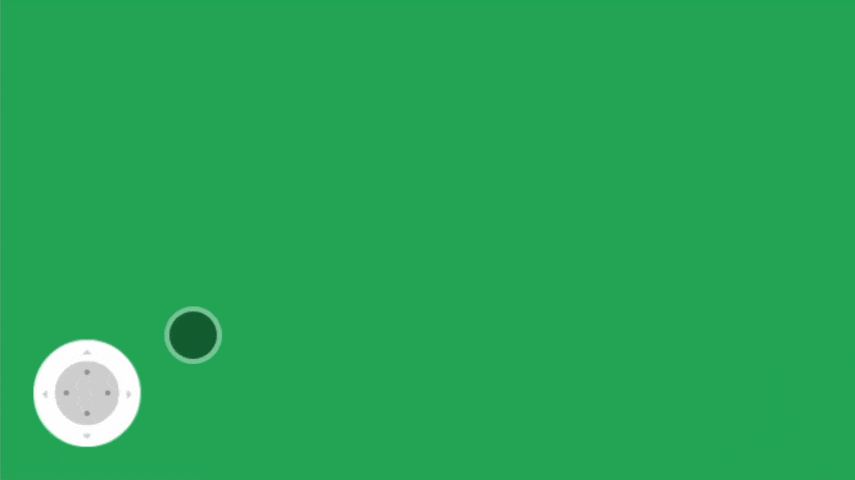
For this example, let's use the 'Left Half Touch Joystick' template.
Create a 2D screen Entity and add the template as a child of the screen Entity.
The joystick is made of three Entities:
- Input area (outlined in red)
- Base (outlined in blue)
- Nub (outlined in blue)
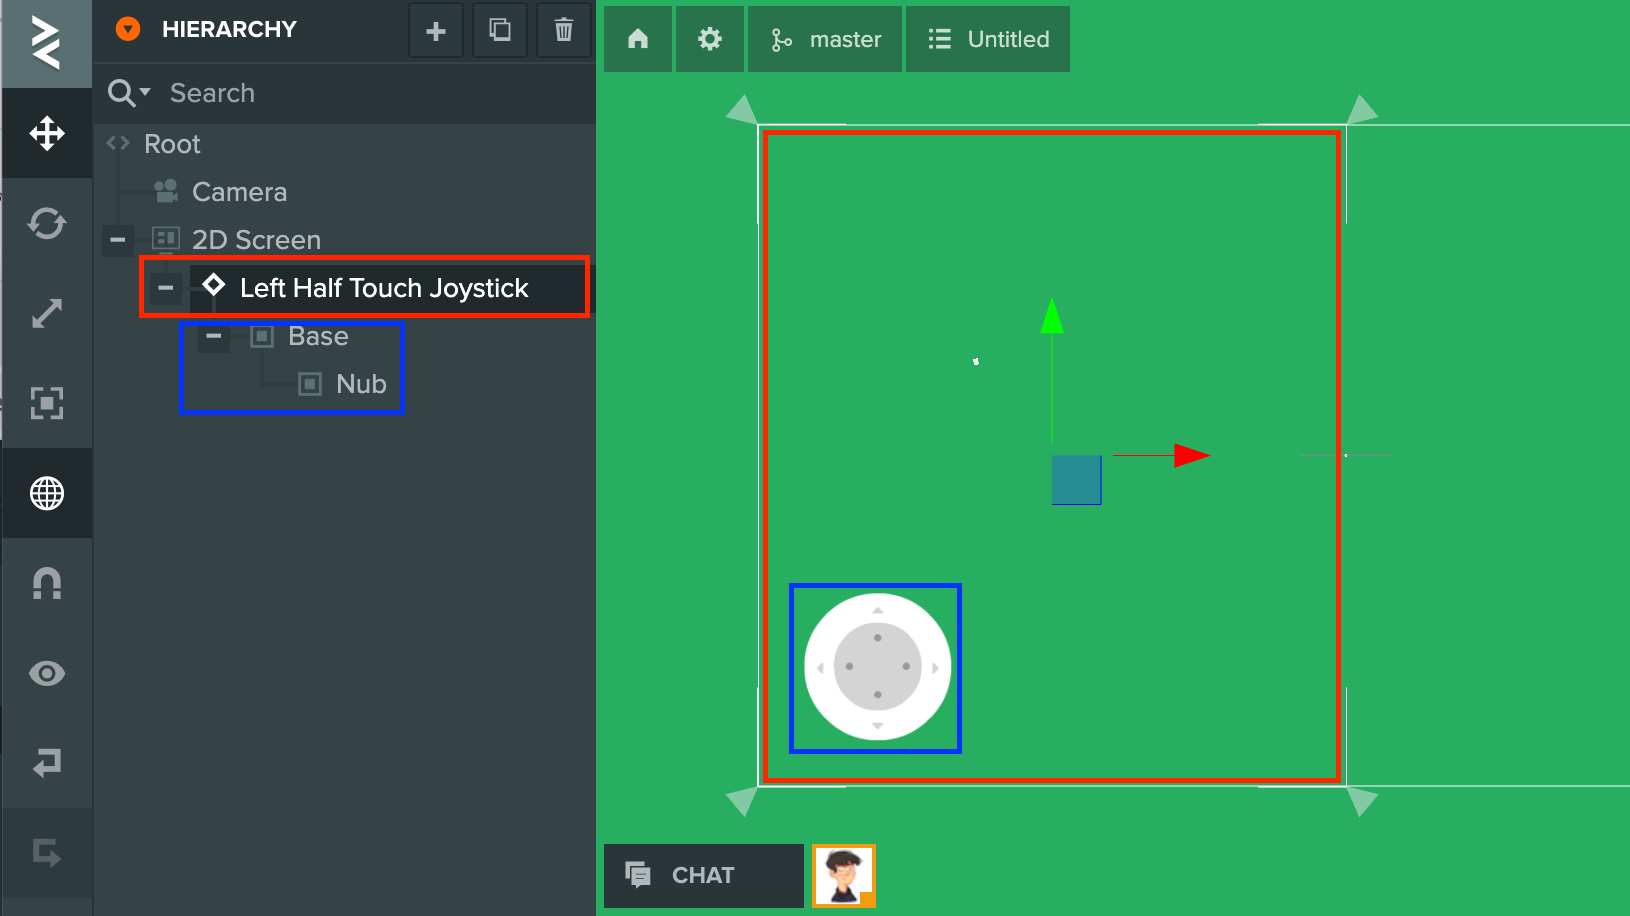
The input area will listen for touch and mouse (for debugging purposes) events and also stops the propagation of the event.
This means that any UI Elements under this and any pc.Mouse or pc.Touch events will not be fired if this area is interacted with first.
As the input area is an UI Element, it can be positioned, sized and anchored specifically for your needs via the UI system layout.
It also has the 'touchJoystick' which has all the logic and attributes for the joystick. Each attribute has tooltips describing what they are for with some more details below.
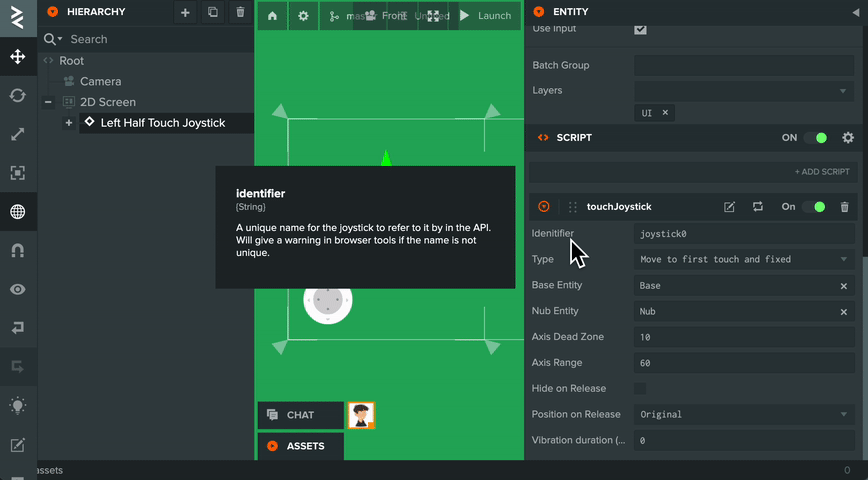
The base and nub Entities are controlled by the script and are UI Elements. If you would like the joystick to be in a different place than where it is in the template, please position and anchor the base Entity to where you need them to be and not the input area.
Behavior Types
There are 3 behavior types for the joystick that are commonly found in touch screen games and applications.
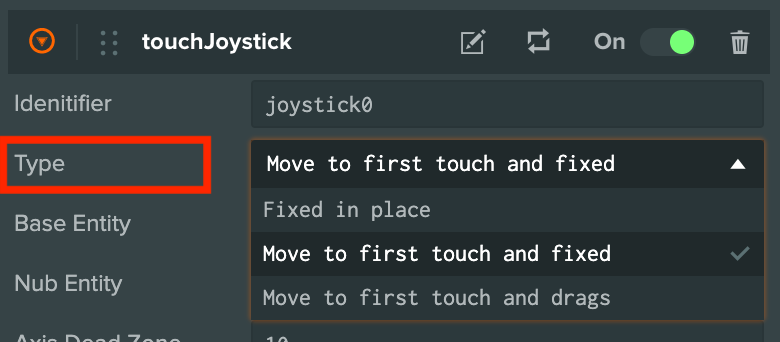
'Fixed in place' where the base of the joystick does not move from it's position:
'Move to first touch and fixed' where the base of the joystick moves to where the user first touches in the input area and then stays
fixed:
'Move to first touch and drags' where the base of the joystick moves to where the user first touches in the input area and then is
dragged when the user drags pass the joystick range:
This can be changed at runtime so it's possible to add this as a user option in the application as part of the in-application settings.
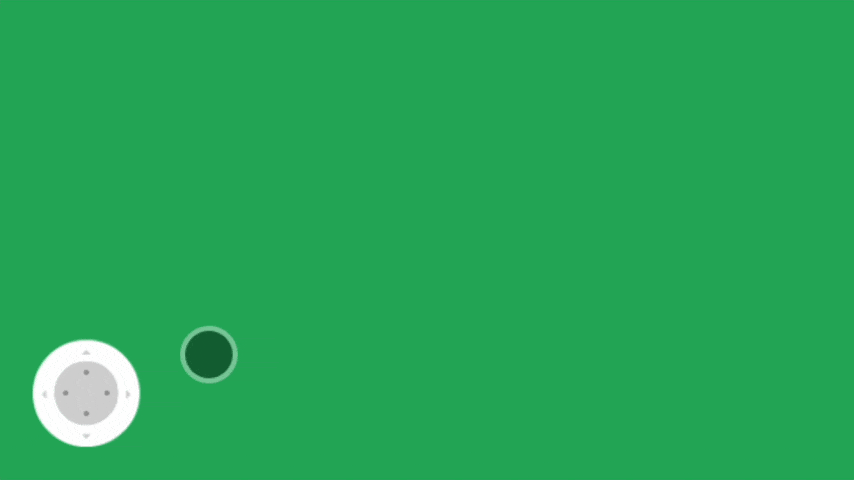
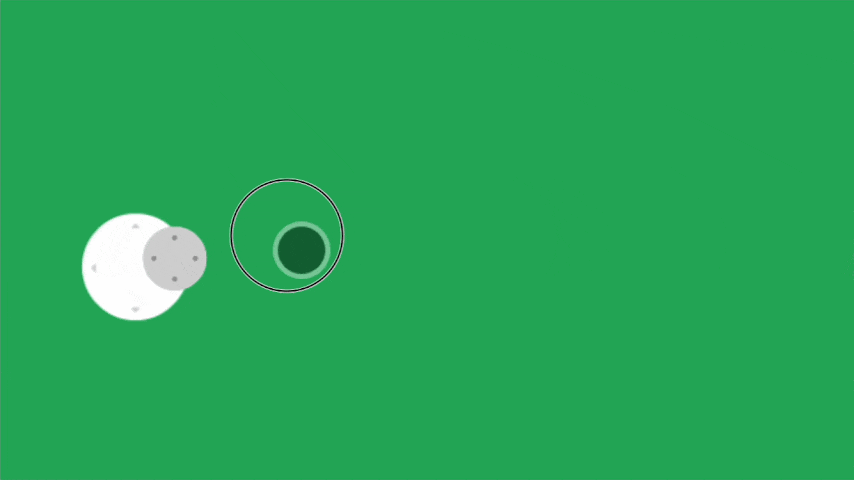
Reading joystick values
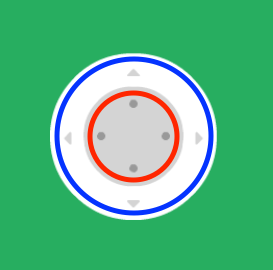
The red circle is dead zone and if the nub position is within that circle, the value from the joystick will return 0 for both axes. The blue circle is the range and the nub cannot go outside that circle.
The values are always normalized between -1 and 1 on both axes based on the where the nub is between the dead zone (red circle) and the range (blue circle).
The size of the circles can be set in the Editor via the script attributes.
Joystick values can accessed in code from the global Javascript object window.touchJoypad.sticks with the identifier. By default,
the identifier is 'joystick0' but can be changed in the Editor on the script to be more specific.
Example code:
// Get the joystick by the identifier from the global object
var joystick = window.touchJoypad.sticks['joystick0'];

// Get the normalized values of both joystick axes and print to console
console.log('X: ' + joystick.x + ', Y: ' + joystick.y);
In the demo, the camera is controlled by the right joystick and you can see how it gets and uses the values in the script here.
Adding your buttons
Buttons are fixed position UI Elements on the screen. There is a template for button in the 'templates' folder and should be added as a child of the screen Entity.
As they are UI Elements, they can be positioned, sized and anchored specifically for your needs via the UI system layout.
Like the joysticks, they have an identifier so they can be accessed in code from the global Javascript object
window.touchJoypad.buttons with the following API.
| Function name | Description |
|---|---|
| isPressed | Takes the button identifier and returns true if the button is currently being pressed. |
| wasPressed | Takes the button identifier and returns true if the button was pressed since the last frame. |
| wasReleased | Takes the button identifier and returns true if the button was released since the last frame. |
| wasTapped | Takes the button identifier and returns true if the button was pressed and released within 200ms. i.e. A quick tap. |
The joysticks are also buttons which gives extra flexibility in how they can be used. For example, using the wasTapped API with a
joystick identifier can act like a L3/R3 input on a PlayStation controller.
Example code:
// Get the button global object
var buttons = window.touchJoypad.buttons

// Check if the button was pressed since the last frame
console.log('Was pressed: ' + buttons.wasPressed('button0'));
In the demo, the character is controlled by the left joystick and buttons. You can see how it gets and uses the buttons in the script here to play attack animations.