Real Time Multiplayer
Use WASD to move the player around. If you only see one capsule, try opening this page in another tab or on another computer.
In this tutorial we’ll cover how to setup a basic multiplayer project using Node.js and Socket.io. We’ll focus on implementing it in PlayCanvas. By the end you should have a project similar to the one above. You can find the tutorial project here.
Setting up the Server
We'll be implementing a client-server model (as opposed to peer-to-peer). This will be a basic server that will receive data from all clients (which are our PlayCanvas instances) and broadcast it back.
Glitch provides a really convenient way to write and deploy backend apps for free completely in
your browser! You can use it without an account but creating one will let you easily find your work. Create a new Node app and replace the contents of server.js
with this:
var server = require('http').createServer();
var options = {
  cors: true
}

var io = require('socket.io')(server, options);

io.sockets.on('connection', function(socket) {
    console.log("Client has connected!");
});

console.log ('Server started.');
server.listen(3000);
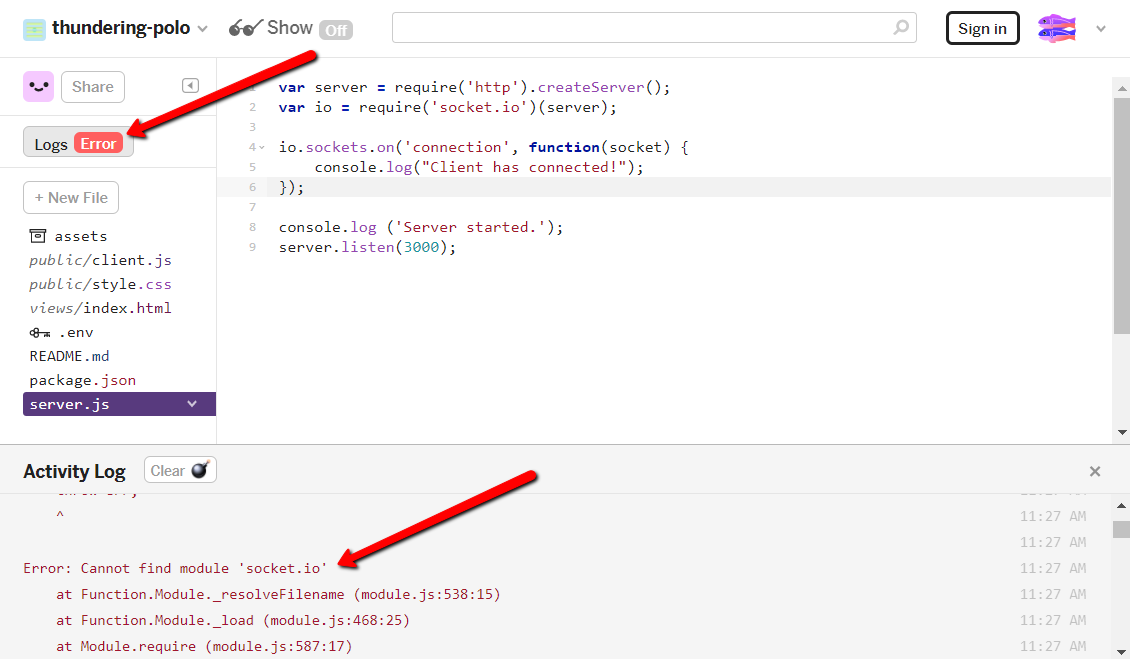
Glitch will automatically re-run the server every time you finish typing. Once you’ve copied this, you should get an error. Click on the
Logs button on the left side of the screen to open up the server console. Here you can see any server output, as well as the
errors. You should see Error: Cannot find module 'socket.io'.
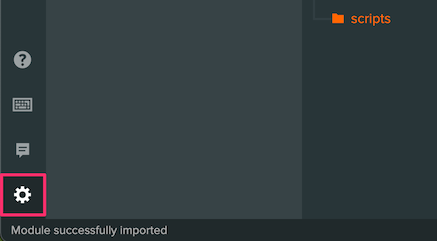
To include a package, go to package.json and click on the Add Package button on the top. Search for
socket.io.

Now if you clear the log and add a space in server.js so it re-runs, you should see Server started. in the log.
You've successfully deployed a server! If you click the Show button at the top, you won't actually see anything. This is
because our server is not listening for any http requests, but instead it's listening for websocket requests.
You can find the domain your server is deployed at by clicking in the top left (where it says thundering-polo for me). This is where
you can also rename the project.
This server will simply log a message every time someone connects. This should be enough to start working on our client and confirm that it connects to the server.
Setting up the Project
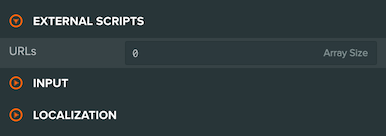
Create a new project on PlayCanvas. We first need to include the Socket.io client JS library, as an external script.
Go to project settings.
Find and open 'External Scripts'.
Change the value from 0 to 1 and add the CDN URL for the socket library from their framework server. In this case, we will be using version 3.1.1 as that is the latest at time of writing:
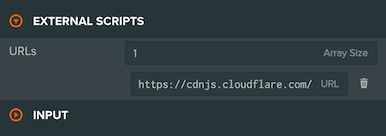
https://cdnjs.cloudflare.com/ajax/libs/socket.io/3.1.1/socket.io.min.js
Now we need to create a new script to handle the network logic. Create a new script called Network.js. We first need to create a
connection to the server. We can do this by adding this line in the initialize method:
this.socket = io.connect('https://thundering-polo.glitch.me');
Replace https://thundering-polo.glitch.me with the address of your own server.
To confirm that this works, attach this network script to the Root entity, and then launch the game. Keep your eye on the server log
at Glitch. If everything worked, the server should log Client has connected!. The project is now setup to send and receive messages
to & from the server.
Server and Client Communication
The way you can send data between the client and server is with the socket connection we made earlier. To send data from the client (in Network.js on PlayCanvas), we use the emit function. Here’s an example:
this.socket.emit ('playerJoined', 'John');
This emits a message called playerJoined, with the data John. For the server to receive the message, we need to write
in the server file (in server.js on Glitch):
socket.on ('playerJoined', function (name) {
    console.log (name);
});
This will log whatever data is sent to the server when playerJoined is emitted.
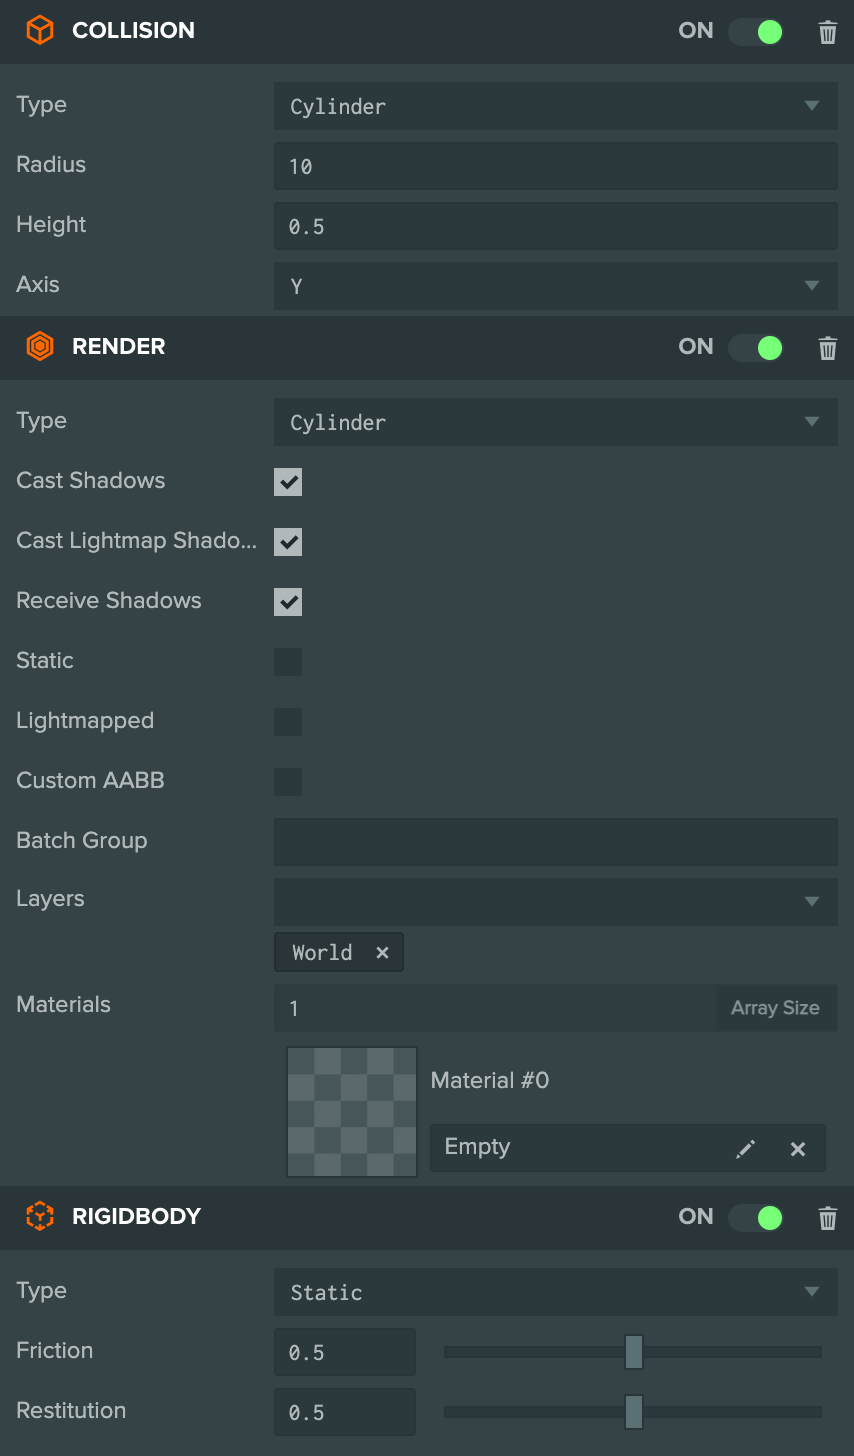
For this demo, we’re aiming to have players move around with others in real time, so we'll need to create an environment. Start by create an entity to use as a ground, and add a collision box and static rigidbody. Here is what the settings on the ground entity should look like:
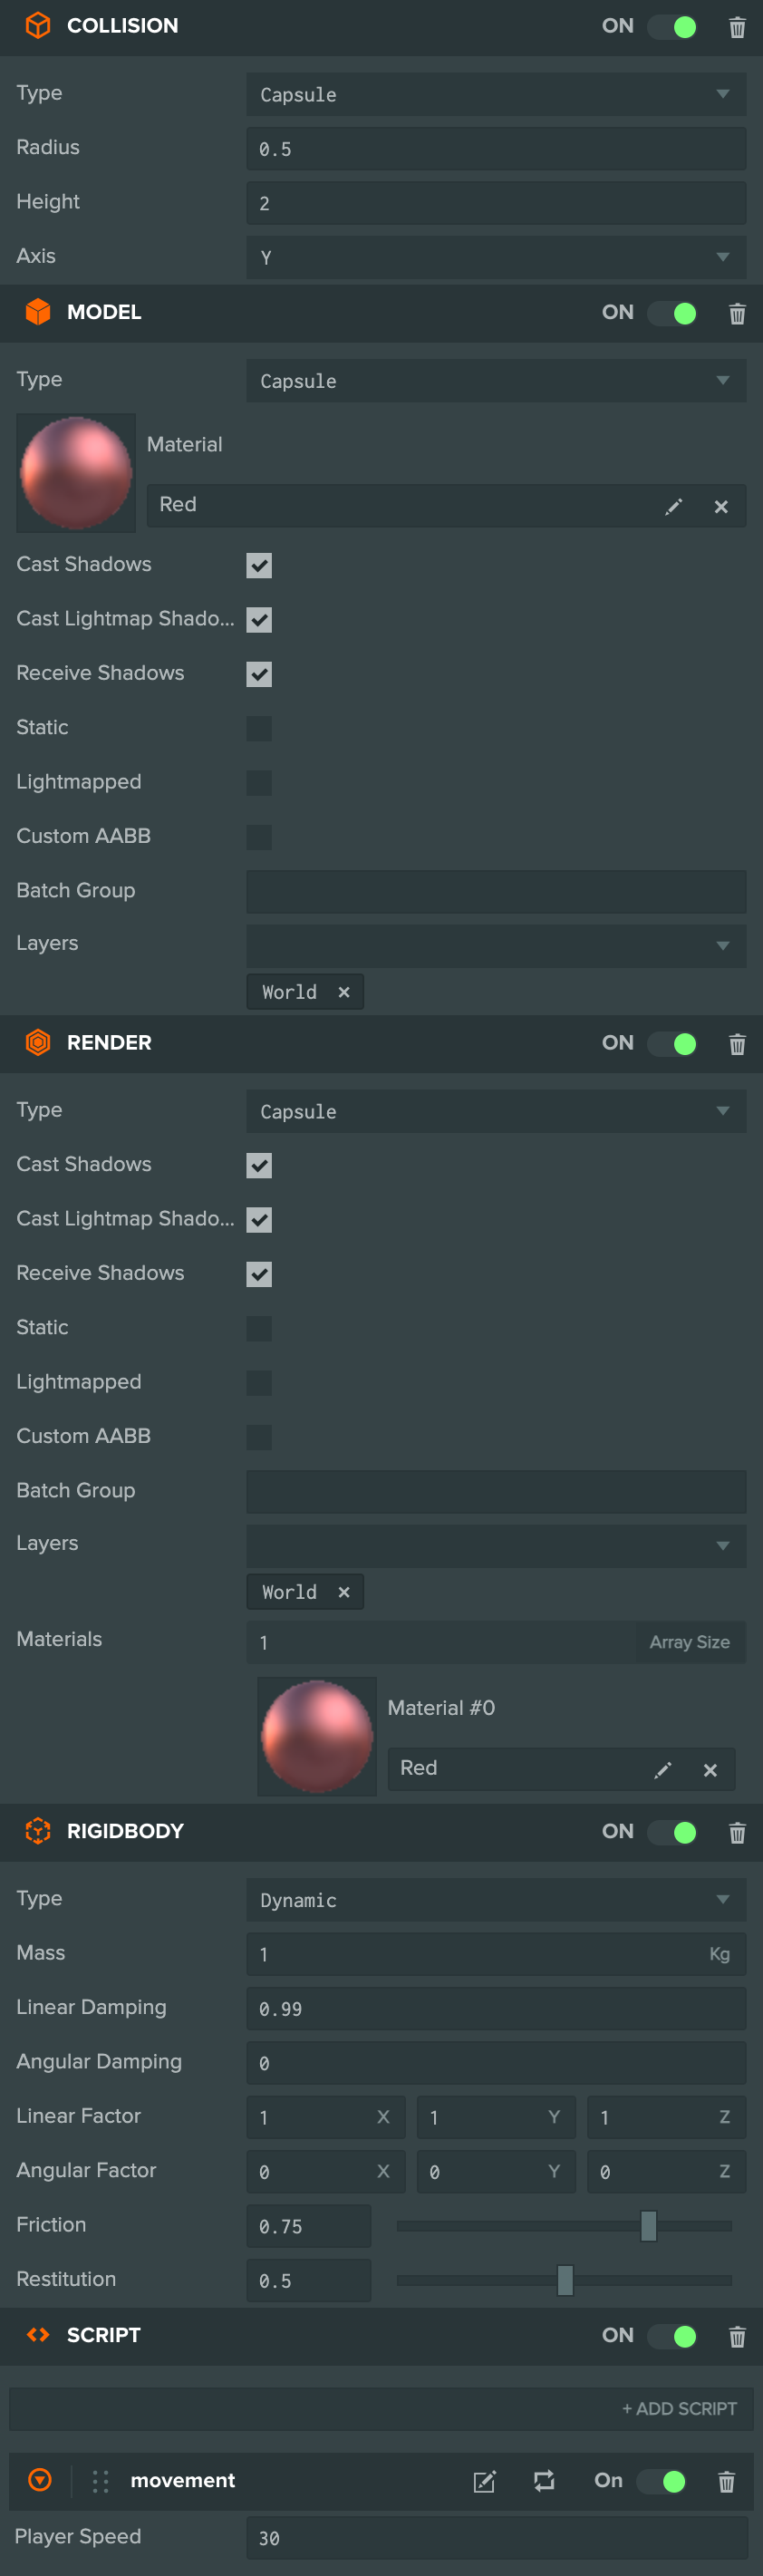
Next we’ll need a player to control. Create a new capsule and call it Player. add a dynamic rigidbody and collision box, and change
the rigid body settings to match the picture below.
Duplicate the player entity and rename it as 'Other'. Uncheck the Enabled box on this new entity so that it's disabled
to begin with. This is the entity we'll be using to simulate other players in the game.
Add a script component to your player, and attach a new script called Movement.js:
var Movement = pc.createScript('movement');

Movement.attributes.add('playerSpeed', {
    type: 'number',
    default: 30,
    title: 'Player Speed'
});

// initialize code called once per entity
Movement.prototype.initialize = function() {
    this.force = new pc.Vec3();
};

// update code called every frame
Movement.prototype.update = function(dt) {
    var forward = this.entity.forward;
    var right = this.entity.right;
    var app = this.app;

    x = 0;
    z = 0;

    if (app.keyboard.isPressed(pc.KEY_A)) {
        x -= right.x;
        z -= right.z;
    }

    if (app.keyboard.isPressed(pc.KEY_D)) {
        x += right.x;
        z += right.z;
    }

    if (app.keyboard.isPressed(pc.KEY_W)) {
        x += forward.x;
        z += forward.z;
    }

    if (app.keyboard.isPressed(pc.KEY_S)) {
        x -= forward.x;
        z -= forward.z;
    }

    if (x !== 0 || z !== 0) {
        x *= dt;
        z *= dt;

        this.force.set (x, 0, z).normalize ().scale ((this.playerSpeed));
        this.entity.rigidbody.applyForce (this.force);
    }
};
When you launch the game you should be able to use WASD to move your player around. If not, you’ve missed a step or did not set the correct settings for the entity. (Try changing the speed attribute on the movement script) For the game to work in real time multiplayer, we need to keep track of all players in the game. Replace the current server code with this:
var server = require('http').createServer();
var options = {
  cors: true
}

var io = require('socket.io')(server, options);

var players = {};

function Player (id) {
    this.id = id;
    this.x = 0;
    this.y = 0;
    this.z = 0;
    this.entity = null;
}

io.sockets.on('connection', function(socket) {
    socket.on ('initialize', function () {
        var id = socket.id;
        var newPlayer = new Player (id);
        // Creates a new player object with a unique ID number.

        players[id] = newPlayer;
        // Adds the newly created player to the array.

        socket.emit ('playerData', {id: id, players: players});
        // Sends the connecting client his unique ID, and data about the other players already connected.

        socket.broadcast.emit ('playerJoined', newPlayer);
        // Sends everyone except the connecting player data about the new player.
    });
});

console.log ('Server started.');
server.listen(3000);
In the code above, when a player sends the message initialize, we send him his unique ID and data about other players in the game.
It also tells others that a new player has connected. Let’s add that logic into our Network script.
Add this code in the initialize:
// Your io.connect function call should be up here

this.socket.emit ('initialize');
var socket = this.socket;

this.player = this.app.root.findByName ('Player');
this.other = this.app.root.findByName ('Other');

var self = this;
socket.on ('playerData', function (data) {
    self.initializePlayers (data);
});

socket.on ('playerJoined', function (data) {
    self.addPlayer (data);
});
And then declare these new functions inside Network.js:
Network.prototype.initializePlayers = function (data) {
    this.players = data.players;
    // Create a player array and populate it with the currently connected players.

    this.id = data.id;
    // Keep track of what ID number you are.

    for(var id in this.players){
        if(id != Network.id){
            this.players[id].entity = this.createPlayerEntity(this.players[id]);
        }
    }
    // For every player already connected, create a new capsule entity.

    this.initialized = true;
    // Mark that the client has received data from the server.
};

Network.prototype.createPlayerEntity = function (data) {
    var newPlayer = this.other.clone ();
    // Create a new player entity.

    newPlayer.enabled = true;
    // Enable the newly created player.

    this.other.getParent ().addChild (newPlayer);
    // Add the entity to the entity hierarchy.

    if (data)
        newPlayer.rigidbody.teleport (data.x, data.y, data.z);
    // If a location was given, teleport the new entity to the position of the connected player.

    return newPlayer;
    // Return the new entity.
};

Network.prototype.addPlayer = function (data) {
    this.players[data.id] = data;
    this.players[data.id].entity = this.createPlayerEntity(data);
};
Now when we join the game, the client tells the server we've connected, and the server sends us a list of players with their positions. The game then creates a new entity for each player connected, and moves them to their current position. The only problem is, the server doesn't know the positions of all players. We need to send the server our current position every frame.
Add this code into the initialize of your Network.js script:
socket.on ('playerMoved', function (data) {
    self.movePlayer (data);
});
Replace your update with this:
Network.prototype.update = function (dt) {
    this.updatePosition ();
};
And then declare these new functions inside Network.js:
Network.prototype.movePlayer = function (data) {
    if (this.initialized)
        this.players[data.id].entity.rigidbody.teleport (data.x, data.y, data.z);
};

Network.prototype.updatePosition = function () {
    if (this.initialized) {
        var pos = this.player.getPosition ();
        this.socket.emit ('positionUpdate', {id: this.id, x: pos.x, y: pos.y, z: pos.z});
    }
};
Back on the server, we need to account for what happens when the player sends us their position. On the server, we need to add a new event:
socket.on ('positionUpdate', function (data) {
    players[data.id].x = data.x;
    players[data.id].y = data.y;
    players[data.id].z = data.z;

    socket.broadcast.emit ('playerMoved', data);
});
When you're testing this, note that the server currently does not account for disconnects. To properly restart, you'll have to close all clients, restart the server (by typing in Glitch) then relaunching the clients.
Conclusion
That's about it! If you'd like, try adding some of these ideas on your own:
- Players are removed when they close the game.
- Adding respawning functionality for when players fall off the edge.
Keep in mind this is only a very basic implementation of multiplayer. Realistically, when creating larger multiplayer games you'll want to consider using an authoritative server, instead of handling all the game logic on the client. You can read a more in depth tutorial about how Socket.io works and how to develop multiplayer in Javascript here.
You can find the full server code on Glitch here, where you can also fork it and extend it.