Making a Simple Game - Part 2
You can find the full project here. If you haven't seen Part 1 read it first.
Material Setup
We've kept the graphics very simple for this game so there isn't too much set up but will have to set up some Material assets for the ball, the background and the overlay.
What is a material?
A Material is a type of asset in PlayCanvas that describes the way that the surface of a 3D model looks when it is rendered to the screen. The material determines the color of the surface, but also the way the surface interacts with light. For example, you can set up a material to be a smooth metal, or a rough rubber. PlayCanvas has a built in material called a Physical Material which should cover 90% of your use cases for a material. When you get more advanced it is possible to create your own materials by using GLSL shader code to write your own.
Cubemap
Before we jump into the materials, we're going to set up our cubemap asset. A cubemap is an asset that consists of 6 textures on the faces of a cube. You can think of this as the far off environment of your scene. The PlayCanvas Physical materials can use a cubemap to do Image Based Lighting. This uses the colors in the cubemap to light materials in the scene. For example in our scene the cubemap has a blue sky and a green grass surface. So our ball will be lit blue from above and green from below. Read more in our documentation.
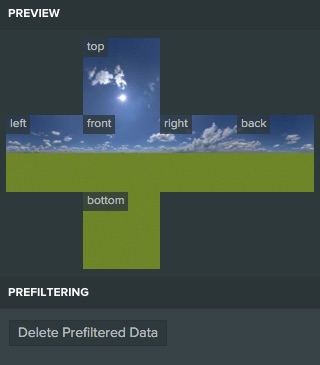
To set up a cubemap, first create a Cubemap asset from the New Asset menu, assign 6 textures, one to each face of the cubemap. When your cubemap has all 6 faces assigned, press the "Prefilter" button. Prefiltering in required for the cubemap to work correctly!
Football Material
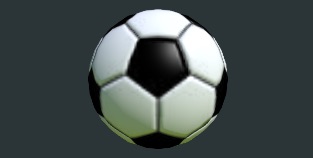
The football is a 3D model that we imported from the PlayCanvas Asset Library. The football materials will mostly be set up for you but you may need to make some simple changes. Lets look at each map used by the football
Diffuse
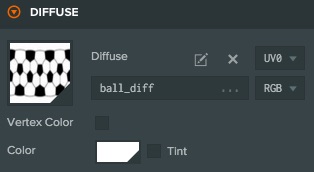
The diffuse map defines the color of the surface. In this case it is the black and white pattern of the football.
Environment
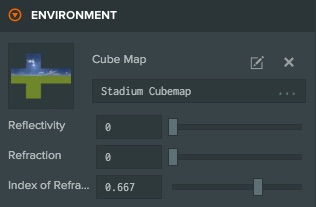
We're going to jump quickly to the Environment section as this is needed to see the effects of the Specular changes. To set up the Environment drag the Cubemap asset on the the cubemap slot in the material.
Specular

The specular section determines how the material interacts with lights. There are two "workflows" for specular, the "Metalness workflow" and the "Specular workflow", you can find more information in our documentation. For the football we are using Metalness, so be sure to check the "Use Metalness" box. Our football is not made of metal, so we slide the metalness slider all the way down to 0. Then we use the glossiness slider to set our rough/smooth the material should be. We've set this to about halfway which gives a nice shine to the ball, but not completely smooth.
Normal
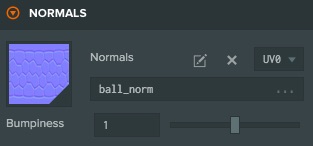
The final texture map we apply is the normal map. The normal map is used to add details to the model. In this case, the separate patches of the football are not modelled in the geometry (which is smooth sphere) but they are in the normal map. This means the ball will be correctly lit as if the patches were there, but without the overhead of lots of extra polygons.
Backdrop Material
The backdrop material is much simpler, we have only one texture map.
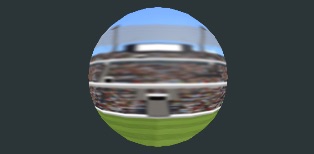
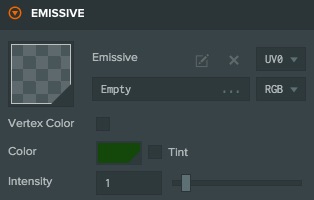
Emissive
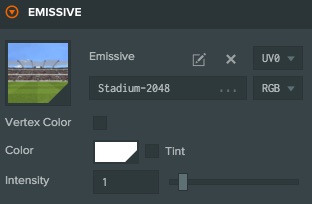
The emissive map sets the color at the surface as if it was emitting light of that color. This means that lights in the scene don't effect how bright an emissive surface is. Note, an emissive material doesn't affect any other objects in your scene, there is no light actually emitted.
In this case, we don't want the background to be lit, it is just a static scene. So we use the emissive map to do that.
Overlay Material
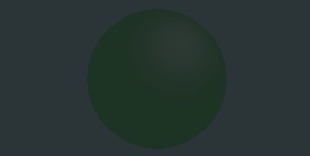
The overlay material is even simpler than the backdrop. In this case all we are doing is setting the color off the emissive property
Continue on to Part 3.