Collision and Triggers
Rigidbodies collide with each other, a sound is played on a collision and a trigger volume resets the shapes.
This tutorial introduces the basics of rigid-body physics, collision detection and trigger volumes. Have a look at the tutorial project.
The Collision Component
The collision component defines a shape which can be used either to trigger events if another Entity enters or exits it -- we call this a Trigger Volume -- or it can be used together with the rigidbody component to give an Entity physical properties in your game -- like a bouncing ball or a heavy crate.
The most important property of a collision component is it's Type, this determines the shape of the volume that will be used. There are four options:
- Box A simple box
- Sphere A simple sphere
- Capsule A pill-shaped capsule. Useful for characters, as it can be tall and thin, but has a nice rounded-base with a single contact point.
- Mesh Use any arbitrary mesh shape for the volume. Note There are some limitations to the mesh collision, in particular, when using it with the rigidbody component, they must be Static.
Trigger Volumes
To create a Trigger Volume all we need to do is add a collision component to an Entity. In this tutorial we're adding a large box-shaped Trigger Volume underneath the slope to catch the falling bodies and reset their position.
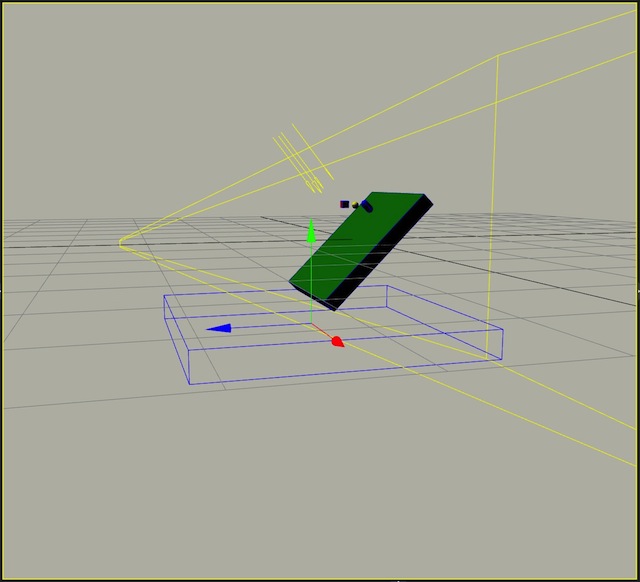
You can see the trigger volume underneath the ramp displayed as a blue outline.
Rigid Bodies
A rigid body is a physical presence in your game world. You can set it up with real physics properties like Mass and Friction; it will collide with other rigid bodies and respond in a realistic manner.
To create a rigid body in your Scene, pick an Entity and add a rigidbody component and a collision component. By default you will create a static box. The rigidbody component has a multitude of options which you can use to tune the properties of your object.
For details on each property take a look at the rigidbody documentation.
For this demo, the important property is the Type. You can pick one of three options:
- Static this Entity will never move.
- Dynamic this Entity will move under gravity and any other forces that you apply to it.
- Kinematic this Entity will not respond to forces, but will move if you directly set it's position or velocity.
Setting up the ground
The first Entity we need in this tutorial is the green block that forms the ground.
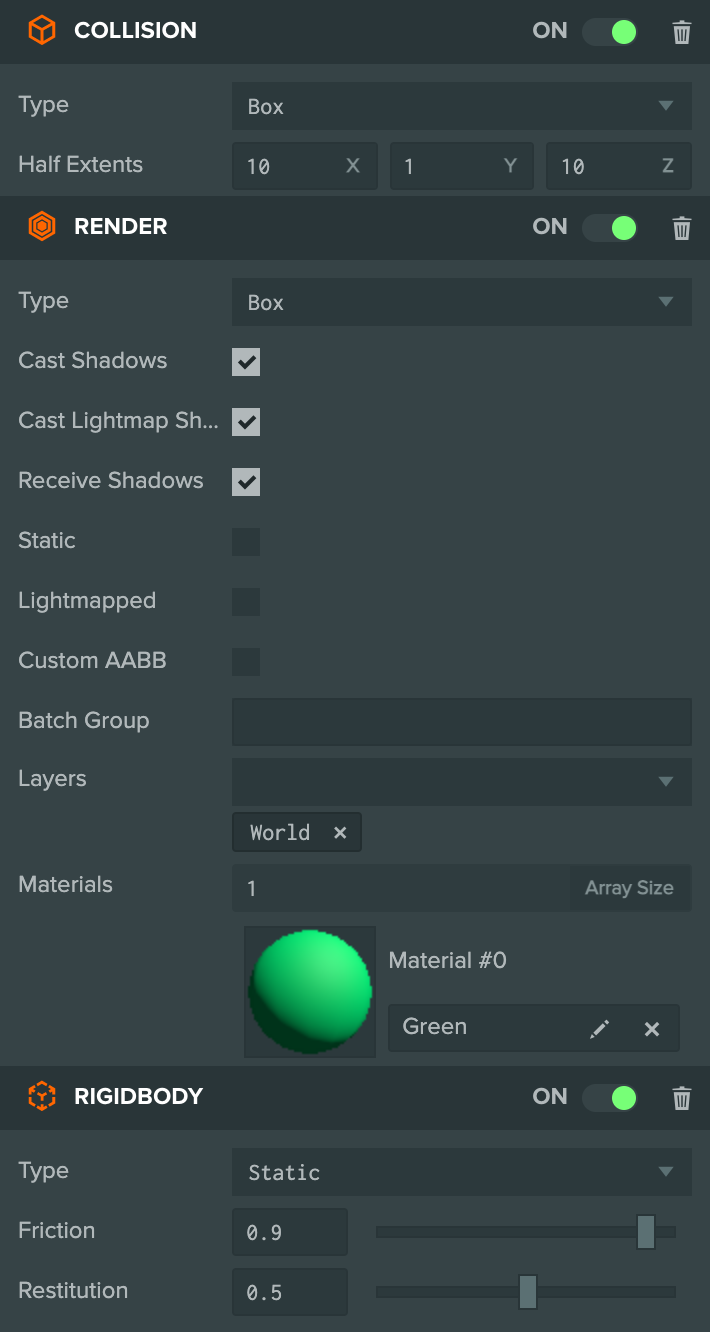
You can see in the attribute panel, that it has render, collision and rigidbody components. We've increased the Entity and the collision box properties so that it is nice and large. And we've also slightly increased the friction and restitution properties. This means that the surface is slightly rougher and slightly bouncier than the defaults.
Setting up the trigger
The next Entity we'll need is the trigger.
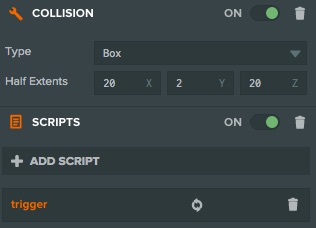
With this Entity we have a collision component but no rigidbody so it acts as a trigger. The trigger Entity also has a script component with some code attached. Triggers are only useful if something happens when they are triggered, so we need to add some code to fire and listen for events when the trigger is activated.
var Trigger = pc.createScript('trigger');

// initialize code called once per entity
Trigger.prototype.initialize = function() {
    this.entity.collision.on('triggerenter', this.onTriggerEnter, this);
};

Trigger.prototype.onTriggerEnter = function(entity) {
    entity.rigidbody.linearVelocity = pc.Vec3.ZERO;
    entity.rigidbody.angularVelocity = pc.Vec3.ZERO;
    // Reset back to roughly the position the entity started in.
    var position = entity.getPosition();
    entity.rigidbody.teleport(position.x, 10, 0);
};
There two significant parts to the code above.
First in the initialize method we start listening to the triggerenter event. This event fires once when a rigid
body enters a trigger volume (where a trigger volume is an entity that has a collision component but no rigidbody component). The companion
event is triggerleave which is fired once the penetrating rigid body leaves the trigger.
this.entity.collision.on('triggerenter', this.onTriggerEnter, this);
Notice, the third argument, this, which is the 'scope' that will be used in the event listener. Usually, you'll want to
add the current Script Object as the third argument so that the value of this in the event listener is that same Script Object.
The second part of this code is the function which handles the event, onTriggerEnter. When the trigger is entered, this function is
called and passed the Entity object entering the trigger volume.
In this case, when the trigger is fired, we reset the penetrating Entity back up to the position it started in, and reset its velocities.
The Rigid Bodies
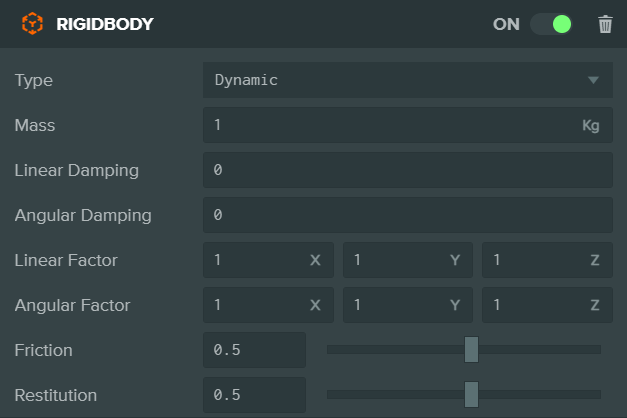
We've set the ground to Static, now we'll create the falling objects and make sure they are Dynamic.
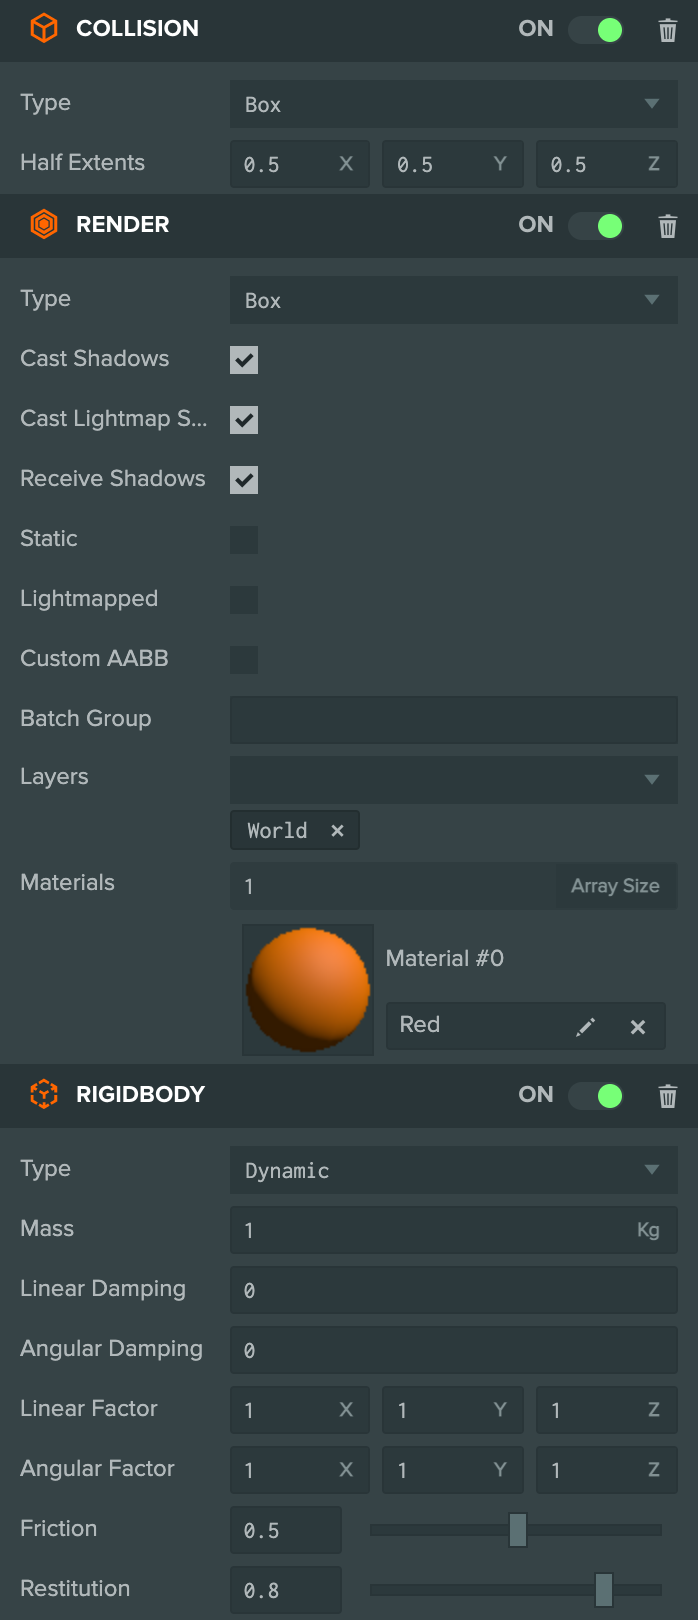
This is the rigidbody and collision setup for the box component, the sphere and capsule are setup in the same way.
Contact Events
There are three events available on the collision component:
- contact - fires for every point of contact when two rigid bodies touch.
- collisionstart - fires at the start of a collision when two rigid bodies touch.
- collisionend - fires when two rigid bodies separate.
The difference between contact and collisionstart is subtle but important. Imagine a cube landing at an angle on a flat surface. When the edge of the cube hits the surface the two corners of the cube will strike at the same moment. Three events will fire, two contact events for each corner of the cube, and one collisionstart event. Then the cube will rotate and continue to fall until it lies flat, all the while remaining in contact with the surface. When it lands flat, two more contact events will fire as the edge of the cube hits the surface. As the cube remained in contact with the surface all that time, no more collisionstart events are fired.
Both events are useful, but in this demo we'll use the collisionstart event to trigger a sound effect that plays when the objects hit the ground. Here's the code:
var Collider = pc.createScript('collider');

// initialize code called once per entity
Collider.prototype.initialize = function () {
    this.entity.collision.on('collisionstart', this.onCollisionStart, this);
};

Collider.prototype.onCollisionStart = function (result) {
    if (result.other.rigidbody) {
        this.entity.sound.play("hit");
    }
};
In the initialize method we set up the event listener, and then in the event handler we check to see if the other entity has a
rigidbody component (this is to avoid playing a sound when we enter a trigger volume) and then we play the "hit"
sound effect. So now, every time an Entity with the collider script attached collides with another rigid body, it will play the hit sound.
And that's all there is to handling Collisions and Triggers in PlayCanvas.