Basic Materials
Materials are what define the appearance of the surfaces of a 3D Model. At its very simplest a Material sets the color of the polygons, at its most complex a material can simulate the surface of an ocean or the way that light passes through glass.
In this tutorial, we'll walk through how you create a Material, assign it to a primitive shape, and edit the Material's properties. First create a new and empty scene.
Step 1 - Add a cube to your scene
Select the root Entity of your Scene. At the start this will be called "Root". In the Attribute Editor rename the Entity to something meaningful, like "Material Tutorial".
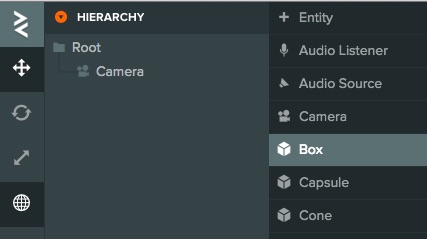
Select 'New Entity' -> 'Box' menu in the Hierarchy panel. This creates a new Box Entity in the Hierarchy.
Step 2 - Create a new Material
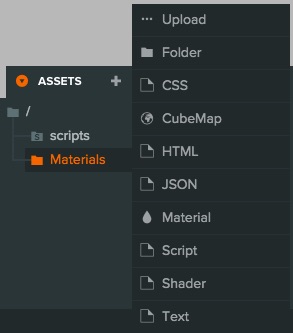
Create new material directly from the PlayCanvas Editor interface. In the Asset panel use the + button to open the New Asset menu and select Material.
This creates a new Material Asset and brings up the Material Editor on the right-hand side of the screen. In the Material Editor rename the Material to "Box Material".
Step 3 - Assign the material to the cube
When you create a new cube in the Editor it will have no material assigned and will be rendered using a plain default material. To assign your new material to a model in the scene simply drag the model from the asset panel into the viewport and drop it on to the model you want to assign it to.
Step 4 - Change the color of the material
To change the color of the Material we will want to edit the Diffuse property of the material.
Select the material either by clicking on it in the asset panel. Or by selecting it from the property inspector when you select the box.
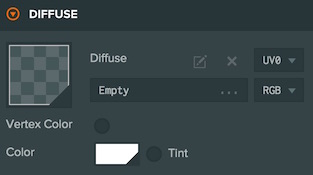
You'll have to expand the Diffuse settings panel in the material editor in the right panel. Click on the color property to edit the diffuse color of the material.
Bonus - Add textures to the material
Changing the color of the material is a good start, but you'll quickly want more detail than a flat color. That is where texture maps come in.
Download & save these sample textures:
Then upload them to your project by dragging the files into the Editor.
Once they're uploaded it's time to assign them to texture slots on the Material. Select the Material as before and open up the Diffuse
section. Drag the proto_orange texture from the asset panel into the empty diffuse slot. Then open the Normals section and drag the
proto_gray_n texture into the normal map slot.
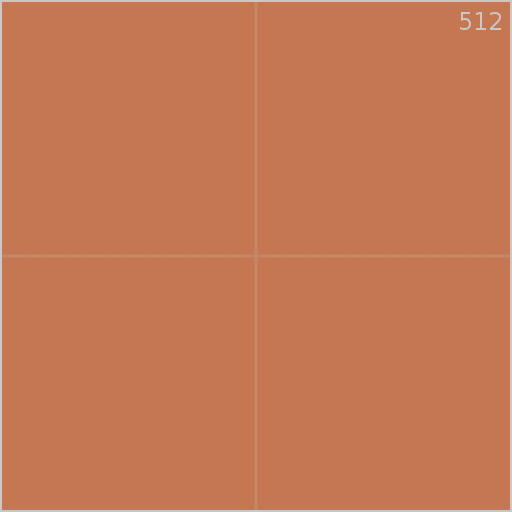
You'll see something that looks a little like this:

Try modifying the Tiling and Offset properties to effect the way the texture is wrapped around the cube.
Take a look at the user manual section on Physical Materials for more depth on setting up materials.