Anim State Graph Blending
Click on screen to focus, then press the 'p' key to blend to a punch animation
This tutorial illustrates the basics of animation blending.
Objects in your scene may be animated; machines or characters are good examples of things that you might want to animate. Generally, when 3D content is created, individual animations are authored and these animations are typically referred to as cycles (because they loop). For example, a human character could have an idle cycle, a walk cycle, a run cycle and so on. As a PlayCanvas developer, you'll want a mechanism to play these animations back on your animated object. Additionally, you do not want these animations to 'pop' as one is switched for another. To remedy this, you should use animation blending which implements a smooth transition from one animation to another. This dramatically improves the visual fidelity of your animated object. Let's examine how this is achieved via PlayCanvas...
The Animstategraph Asset
In order to add animations to a model, we must first create an animstategraph asset. These assets control multiple animations associated with a single entity, determine when each of those animations should play and how they should be blended together.
When creating an animstategraph asset, you’ll be presented with its editor:

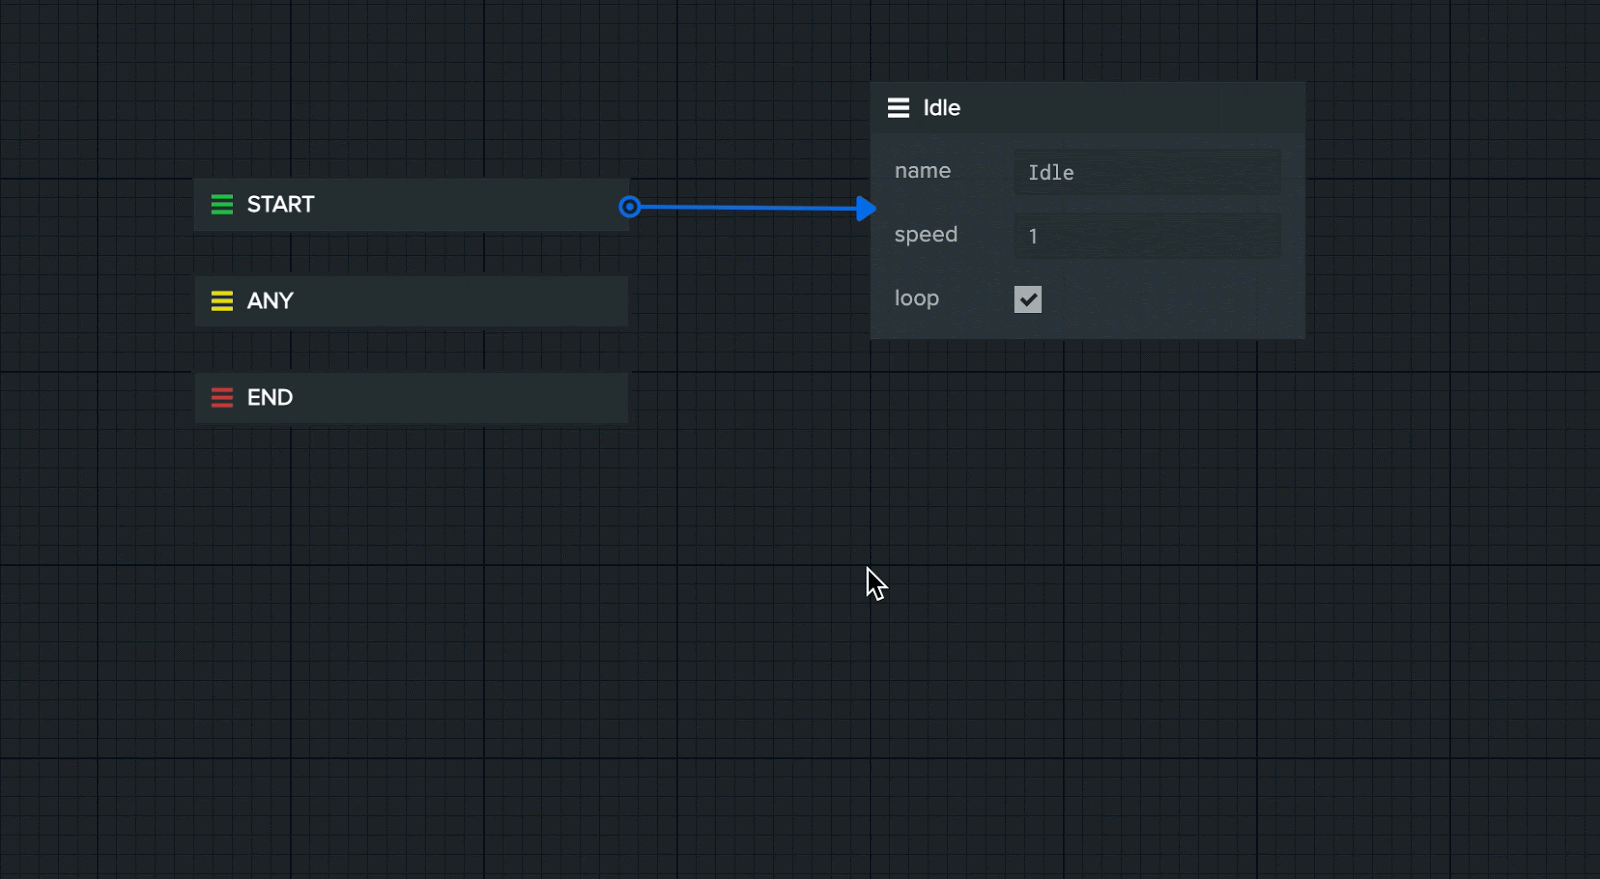
By default, the animstategraph asset creates a single animation state called ‘Initial State’ which has a default transition from the START state
to it. This means when the animstategraph first begins playing, it’ll immediately begin playing the Initial State. This can be renamed to Idle
which is the name of the initial animation used in this tutorial. We can then right click the canvas and select Add new state to
create another animation state in the graph. This state can be renamed to Punch:
Next we must tell the state graph how and when it should move between the Idle and Punch animation states. This is achieved by creating
transitions. Right click the Idle animation and select Add transition from the context menu, then select the Punch animation state.
This will create a transition moving from the Idle state to the Punch state.

Selecting this transition will show the transition inspector in the panel to the right. Here the duration of the transition can be set, which will determine how long the blend between the two animations should last. We’ll set this to 0.2 seconds.
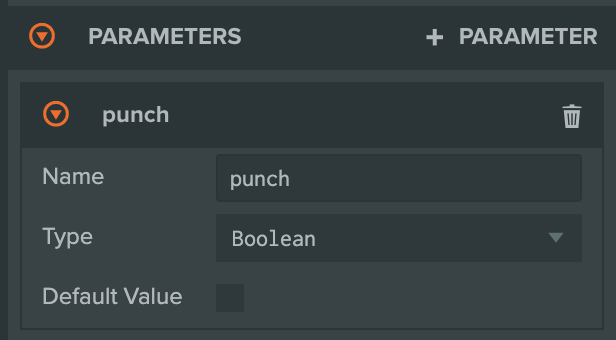
Next, we can set up a parameter which will determine when this transition can activate. First select the + parameter on the
parameters panel to the left. Then name this parameter punch and set it to the ‘Boolean’ type.
This parameter can now be set as a condition for the transition we just created. Select this transition then select New Condition in
the transition inspector.
Set this transition to test against the newly created punch parameter and set the condition to ‘== true’ as follows:
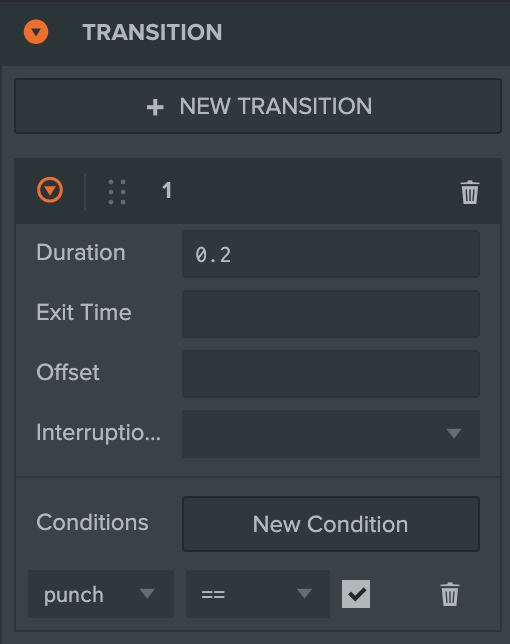
This will ensure that the transition from the Idle state to the Punch state only occurs once the punch parameter has been set to true.
Lastly, we need to create one more transition moving back from Punch to Idle as follows:
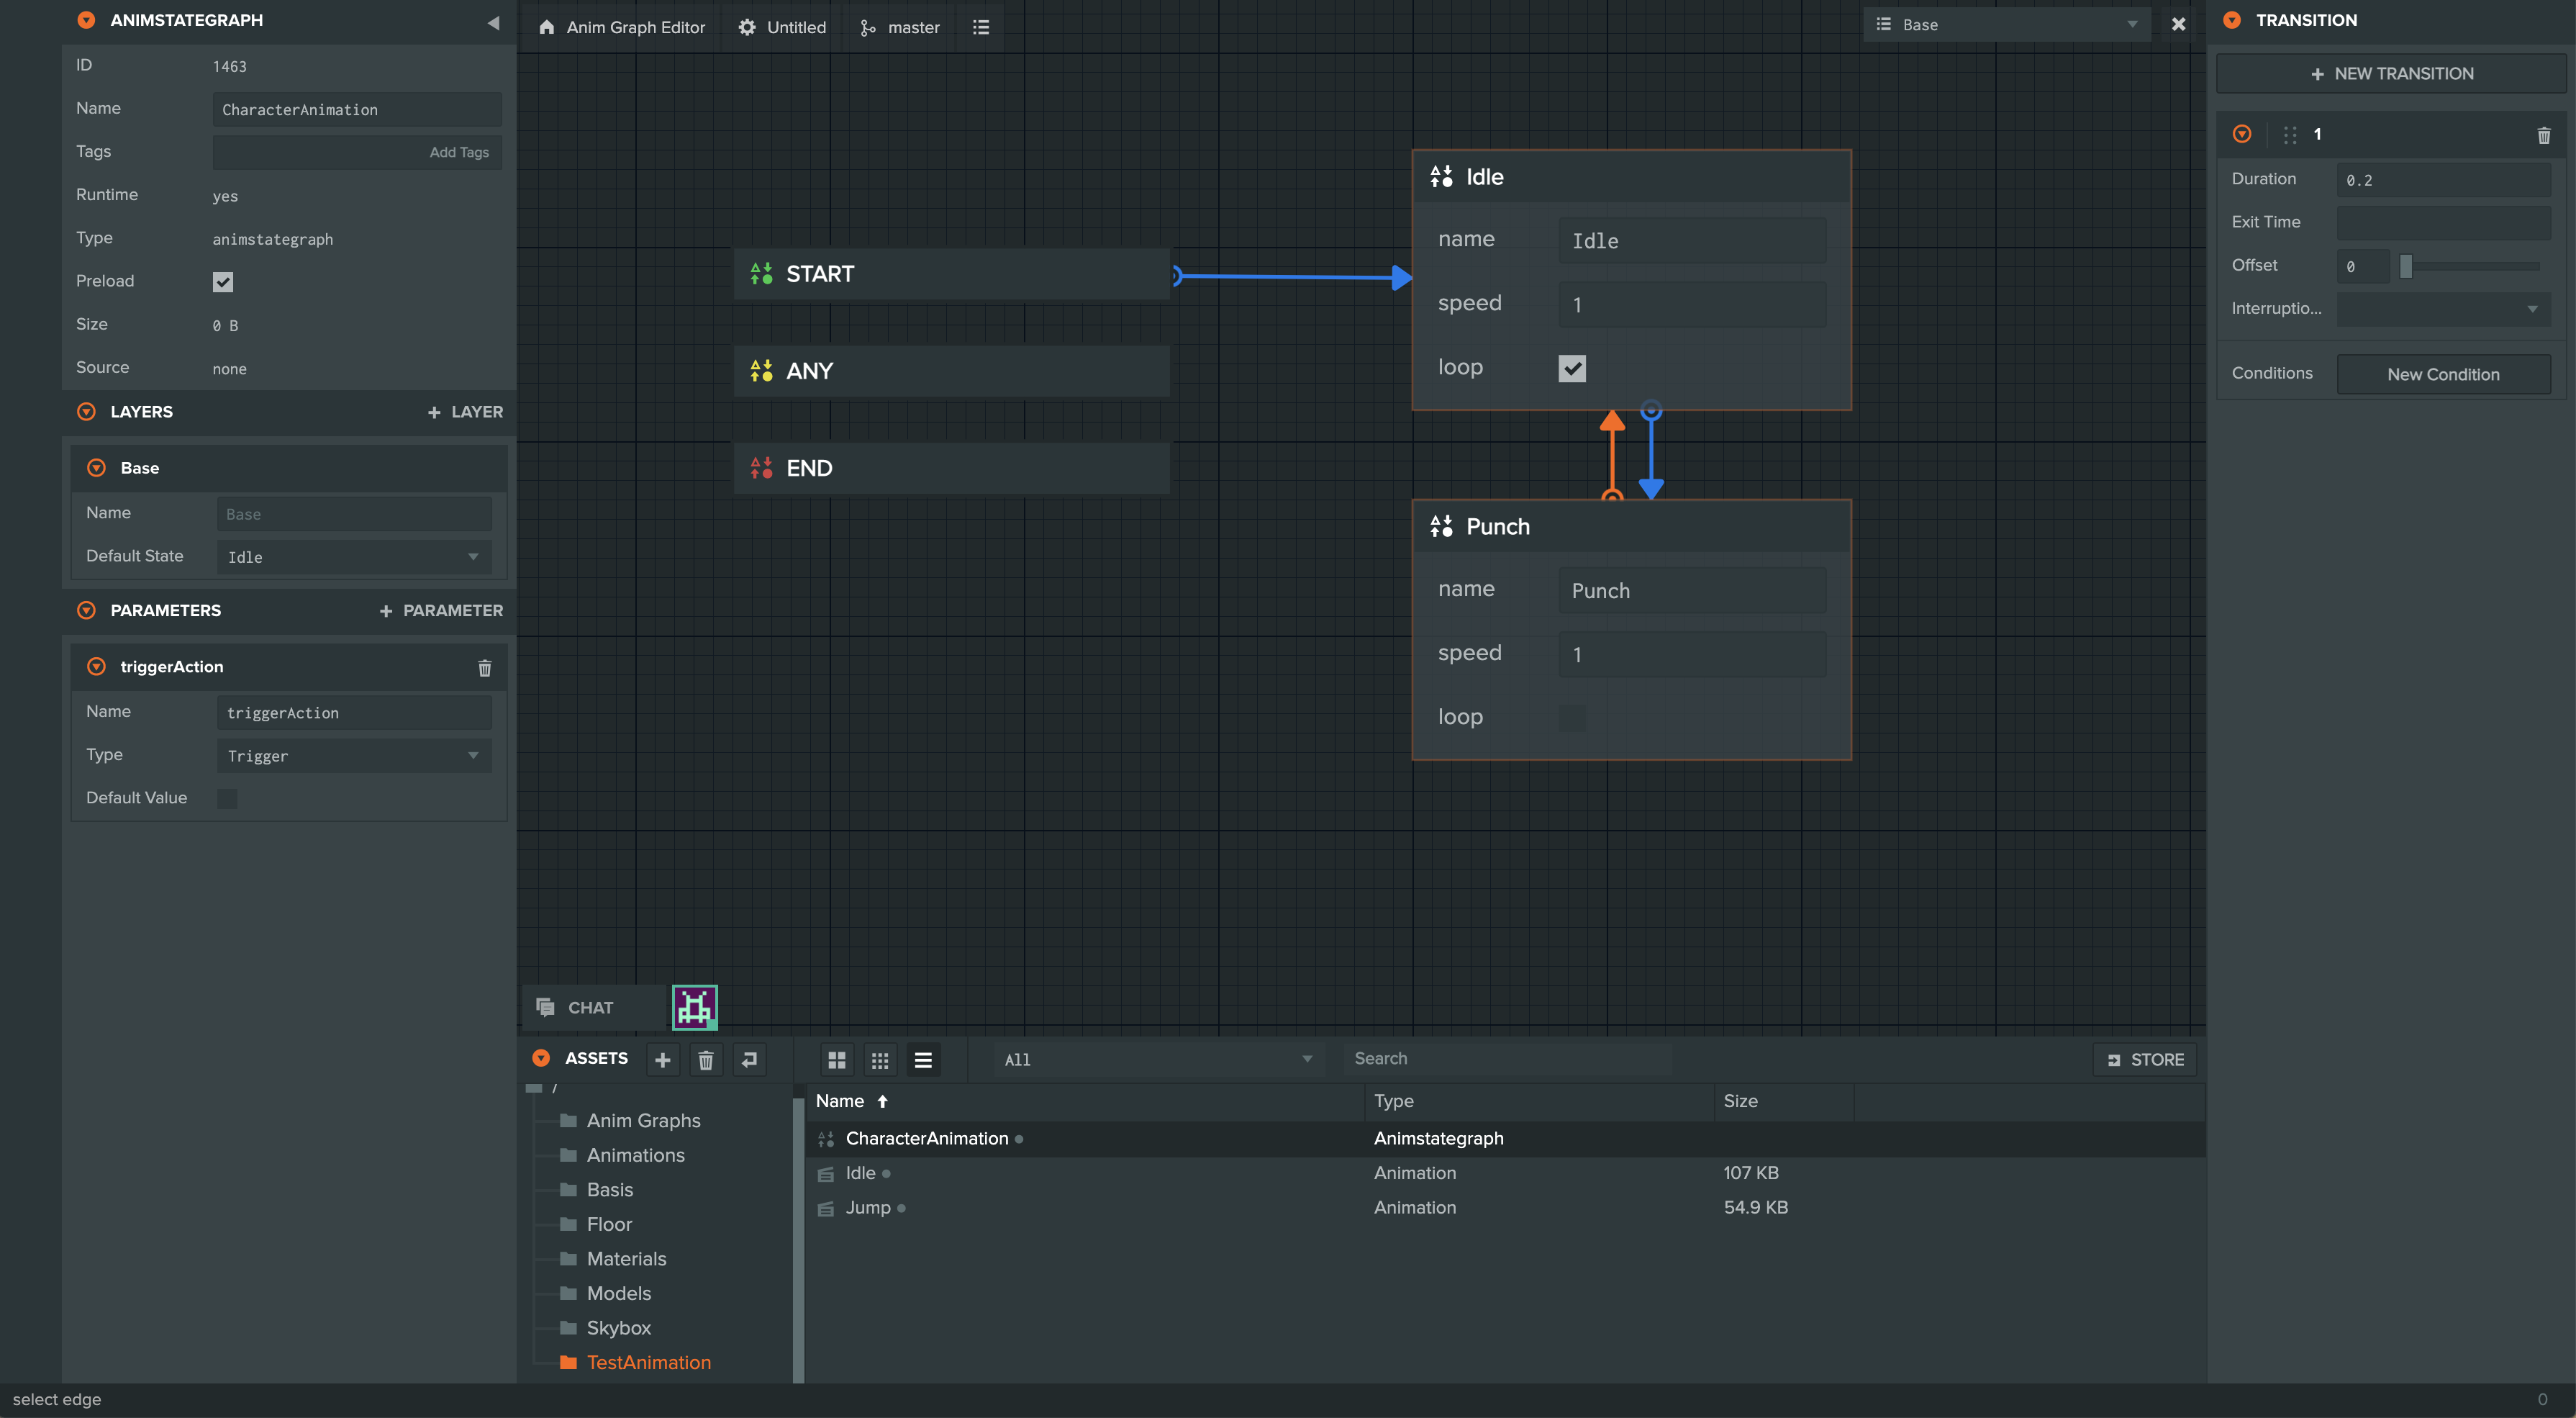
Here we have set it up with the same duration but its condition tests whether the punch parameter is no longer true.
Now with this complete animstategraph, we must connect it to animation assets and the chosen entity. This is where the anim component comes in.
The Anim Component
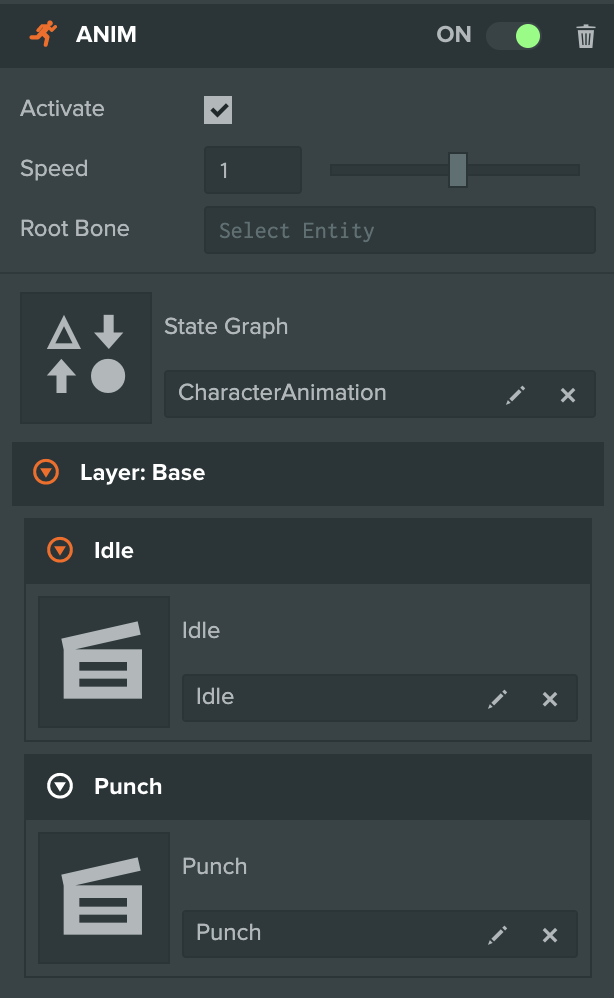
First, we must add the anim component to our chosen entity.

Once created it’ll display a slot for the animstategraph asset we just created. Drag this in and it’ll display animation slots for each of the animation states present in it. In this case it’ll have slots for the Idle and Punch states. Fill these slots with the appropriate animation assets and the anim component will become playable:
Keyboard Input
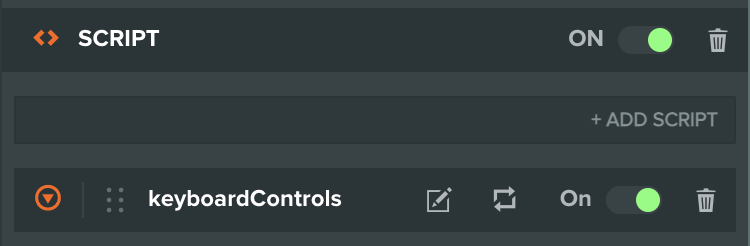
With the animations fully set up, we now need to make it possible for users to interact with our system. This is where scripts come in! A script
component is required to enable this behavior which will be written in the script keyboard_controls.js. You can see how it’s
attached to the entity below:
Remember that parameter punch that we set up before? This script will simply toggle that parameter on and off depending on whether
the ‘P’ key is currently pressed and whether the character is currently punching:
var KeyboardControls = pc.createScript('keyboardControls');

// initialize code called once per entity
KeyboardControls.prototype.initialize = function() {
    this.app.keyboard.on(pc.EVENT_KEYDOWN, this.keyDown, this);
    this.app.keyboard.on(pc.EVENT_KEYUP, this.keyUp, this);
};

KeyboardControls.prototype.update = function(dt) {
    if (this.app.keyboard.wasPressed(pc.KEY_P) && (this.entity.anim.baseLayer.activeState !== 'Punch')) {
        this.entity.anim.setBoolean('punch', true);
    }

    if (this.app.keyboard.wasReleased(pc.KEY_P) && (this.entity.anim.baseLayer.activeState === 'Punch')) {
        this.entity.anim.setBoolean('punch', false);
    }
};
From this point, you are able to add more and more animations to the animstategraph asset and start building much more complex animation state graphs!
See the full Scene here